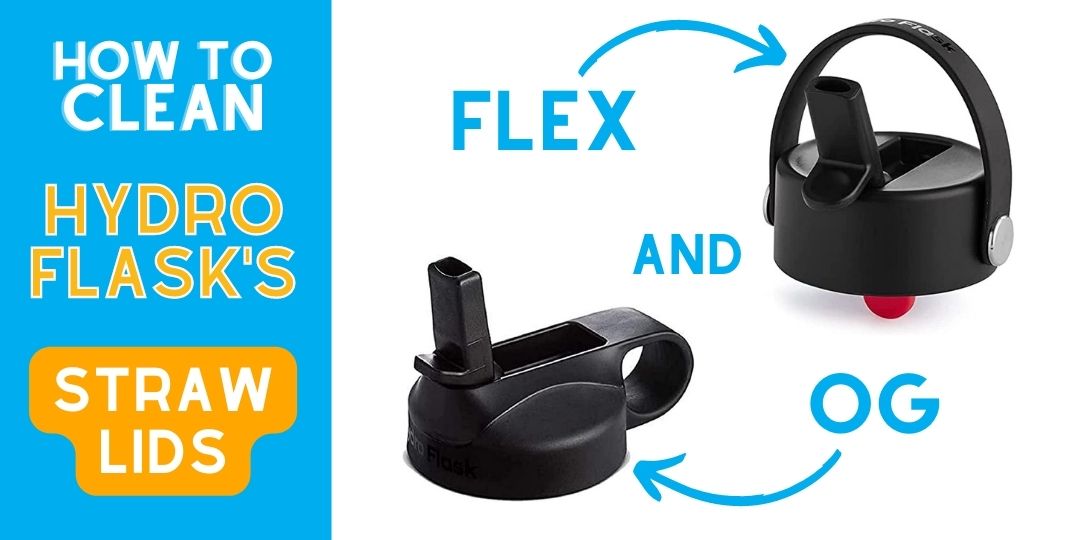
BOTTLEPRO
  • Home
  • Learn
    • Gear Reviews
    • Instructional Videos
    • Hydration Information
  • Shop
    • Cup Holder Adapter (3rd Gen)
    • Cup Holder Adapter (2nd Gen)
    • Splash Guard
    • Infusers >
      • FlavorFuze Pod
      • FlavorFuze Straw
      • FlavorFuze Steel
    • Carrying Pouches >
      • Leather Bottle Carrying Pouch
      • Neoprene Bottle Carrying Pouch
    • Cooler Dividers
    • Arm Rest Cup Holder
  • Demos
  • Hydration Blog
  • About Us
  • Contact Us

How to Clean your Hydro Flask Straw Lid (Flex and Original)

2/23/2023

0 Comments

 
How to clean a Hydro Flask Straw Lid - Flex and Original

How to Clean a Hydro Flask Straw Lid

Hydro Flask has two straw lid options, their original design and the newer Flex Straw that was released in early 2022.  They can be fairly tricky to clean, but we're going to review the step-by-step process so you can get a better deep clean on your Hydro Flask Flex Straw or original straw lid.  This includes showing the complete disassembly of each one, as well as giving some general recommendations.

Content Overview:
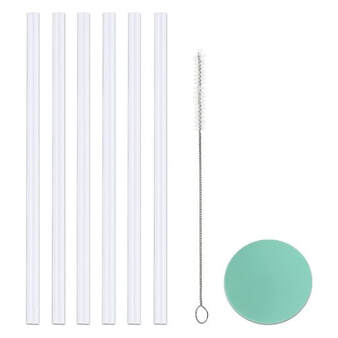
  1. Video link (covers similar information as this post)
  2. Are Hydro Flasks Dishwasher-Safe?
  3. How to Clean a Hydro Flask Bottle
  4. How to Clean a Hydro Flask Straw Lid (Original Version)
  5. How to Clean a Hydro Flask Straw Lid (Flex Straw)

Recommended Products:
  • Hydro Flask Original Straw Lid
  • Hydro Flask Flex Straw Lid
  • Complete Bottle Brush Kit - Best for Straw Lids
  • Cleaning Tablets
  • Replacement Straws
  • Fun Add-On: FlavorFuze Straw Fruit Infuser (snaps onto Hydro Flask straw lids)

Video Review

Our YouTube video covers the same information in this post, so click the link below if you'd rather see the video showing our cleaning process.  Otherwise, keep reading the full post below!

A Real Quick Thank You!

If you found this post helpful, you can use the links to buy any of the items you need off Amazon.  We get a small commission if you purchase that way, and every little bit helps our small business.  It enables us to keep making information videos and posts like this one.  We really appreciate the support!

Are Hydro Flasks Dishwasher-Safe?

​Let’s get this out of the way first.  We know it’s a pain in the butt, but we generally recommend hand washing all Hydro Flask products.  The reason why is that it’s pretty confusing to know which Hydro Flask products are actually dishwasher-safe and which ones aren’t.  Even if it says the product is dishwasher-safe, Hydro Flask mentions that some accessories like caps may last longer if they are hand washed.

​So to be safe, we recommend sticking to hand-washing as much as you can to help your Hydro Flask products work well for many years to come.

How to Clean a Hydro Flask Bottle

​This one's pretty self-explanatory, and here are two of the items we use most for deep cleaning our large bottles.

For cleaning the bottle, just use warm soapy water and your bottle brush.  We do this every day before going to bed.

For a deeper clean, you could use cleaning tablets like the ones made by Bottle Bright.  We recently tested Bottle Bright tablets to clean the tea and coffee stains from a 20oz Hydro Flask Coffee bottle, and the results were very impressive!  We're going to start doing this at least on a monthly basis, but we're not sure exactly what the best frequency is.  Let us know what you think!
Complete Brush Kit for Hydro Flask Straw Lids
Brush Kit for Hydro Flask Straw Lids
​Get a bottle brush kit like this one that includes a longer brush, a straw cleaner, and a detailing brush to make hand-washing your Hydro Flask Straw Lid much easier.
See Amazon Listing
Bottle Bright Cleaning Tablets
Bottle Cleaning Tablets
We're going to start using these every so often for a really deep clean.
See Amazon Listing
(One person also responded to our post to say that denture tablets work too and can save some money.  We haven't tested those, but they have quite a few similar ingredients so they should work as well.)
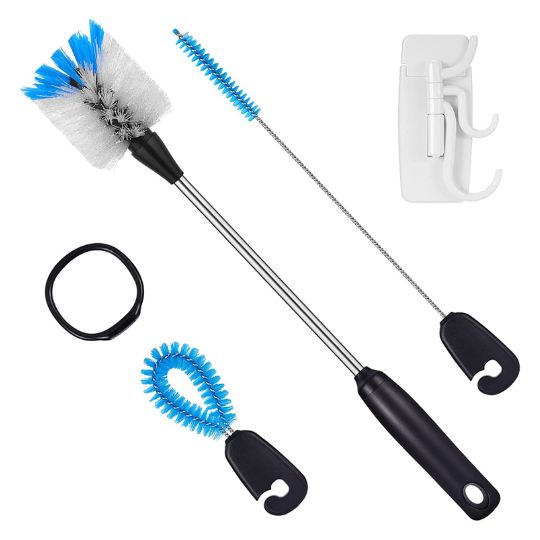
Now on to the lids.  Get your brush kit, a sponge or rag, a butterknife or some other kind of picking tool with an end that won’t cut silicone, and a bowl with warm, soapy water.  It’s also a good idea to get set up at least a few feet away from your sink since you’ll be handling some pretty small parts, and you don’t want to accidentally drop them down the sink.

How to Clean a Hydro Flask Straw Lid (Original Version)

Hydro Flask's Original Straw Lid
Original Straw Lid
Hydro Flask's Flex Straw Lid
Flex Straw Lid
First we’ll look at the original straw lid.  If you’re not sure which lid you have, just look at the handle.

​The Flex Straw has the flexible loop handle, and the original straw lid has a small rigid handle that fits one finger.
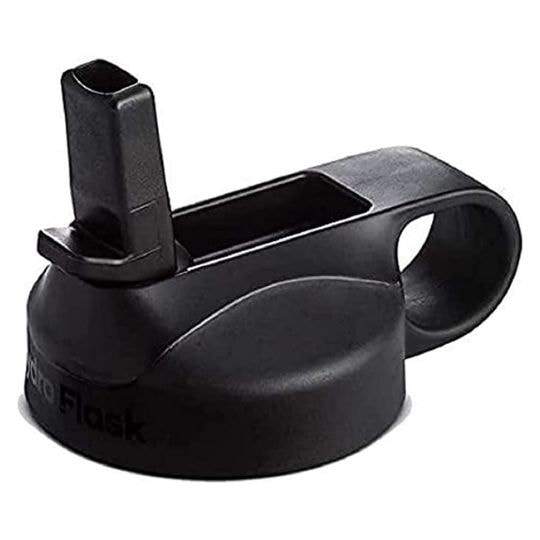
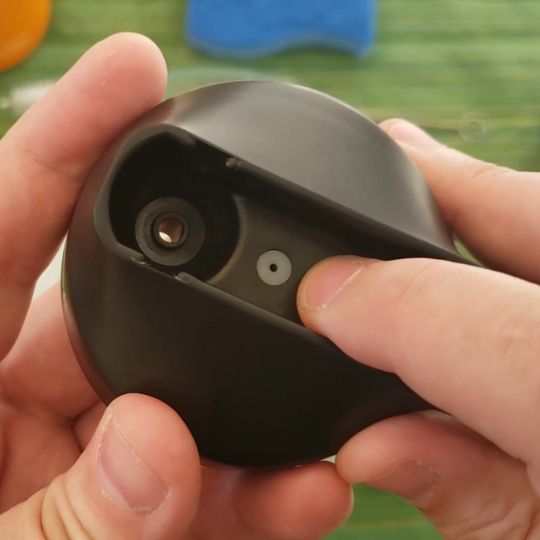
Step 1: Disassemble the Lid
Start by disassembling the lid.  The straw is attached with a friction fit on the cap, so you can just pull it off.  Next, pop off the spout by pushing it past the open position.
Remove the straw
Remove the straw
Remove the spout
Remove the spout
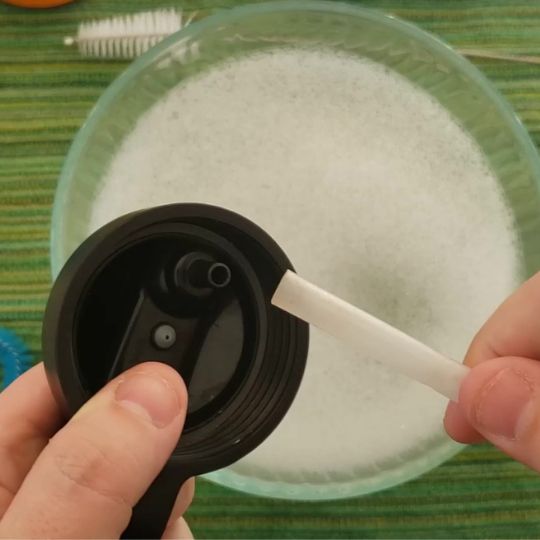
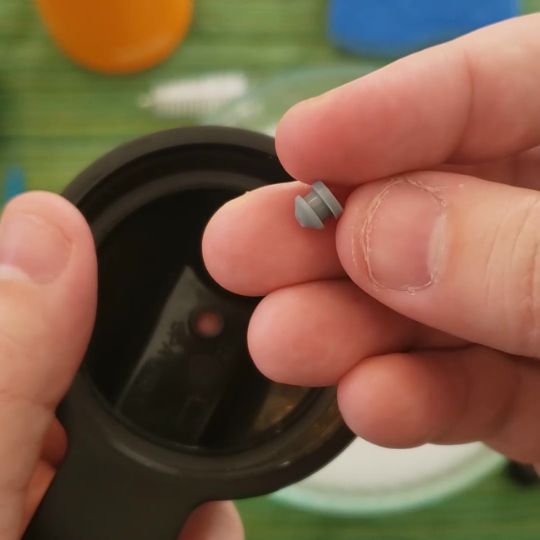
Remove the spout seal either by tapping the lid upside down, using your fingernails, or use a small tool like tweezers or the butterknife.
Spout Seal Location
Spout Seal Location
Spout Seal Closeup
Spout Seal Closeup
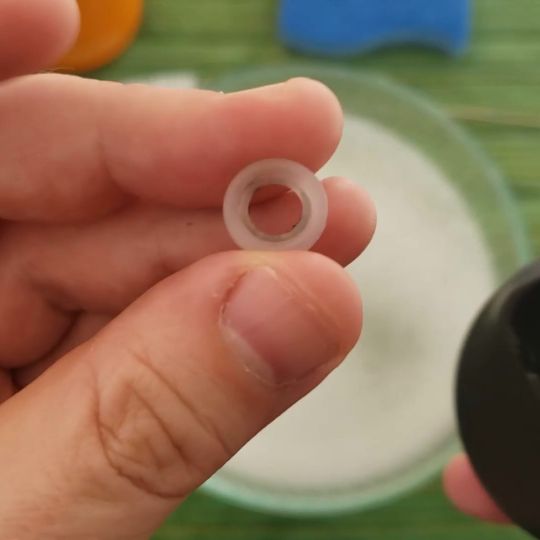
The silicone vent hole insert doesn’t usually get that dirty, but for a really deep clean you can pop that out too.  Just use your thumb or fingernail to pry it out from the bottom.
Vent Hole Insert Location
Vent Hole Insert Closeup
And the last removable piece is the big o-ring under the threads.  This o-ring generally doesn’t get as dirty so you may not need to clean it as often, but it’s still good to clean it every once and awhile.  You need to use a butterknife or other kind of tool to get it out, but it’s not too difficult.
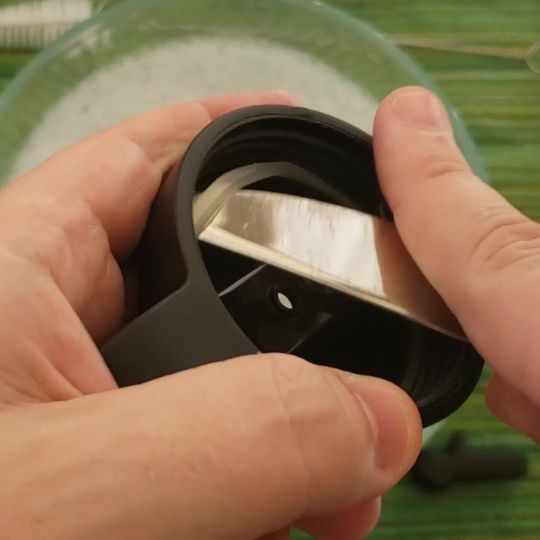
Main O-Ring under the Threads
Step 2: Clean Everything
​Clean each piece thoroughly.
​
  1. Use the straw cleaner to get inside the straw, from both sides if your cleaner isn’t long enough.
  2. Use the detailing brush or toothbrush to clean up under the threads in those hard-to-reach areas.
  3. Clean the air and spout holes in the cap with the straw cleaner.
  4. Don’t forget to clean inside the detached spout itself.
  5. We like to let each piece soak in the warm, soapy water for at least 15 minutes, take it out for a rinse, and then lay everything out on a towel to dry.
Replacement Straw Kit for Hydro Flasks
There are a bunch of straw kits available on Amazon, and you can usually get a good set for under $10.  Here's one to check out!
See Amazon Listing
Step 3: Reassemble the Lid
Once it’s all dry, we put it back together the way it was before.  This should be pretty simple since you saw how it all came apart, but there are a few things to double-check to make sure you don't have too much leaking.
​
  1. Add the large o-ring first and make sure it’s properly seated to prevent leaking.
  2. Insert the small vent piece simply by pushing it into the hole from the top-side of the lid.
  3. Make sure you add the spout gasket in the correct orientation.  If you look closely, you’ll notice that one side has a slight taper that conforms better to the rounded bottom of the spout.  Make sure this side faces up or your cap might leak more (see the image below).
  4. Pop your spout back into place
  5. Reinsert your straw.
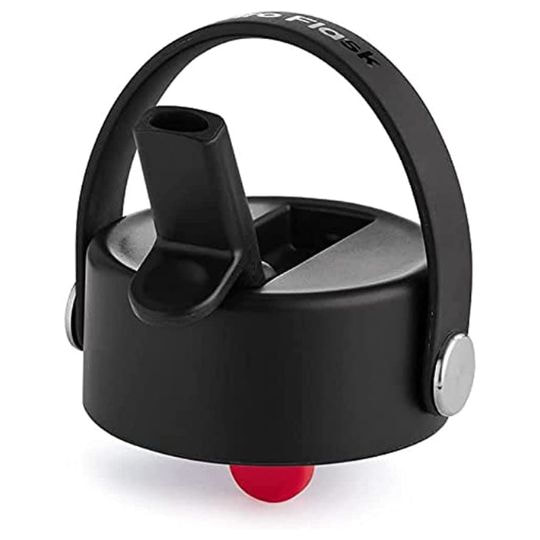
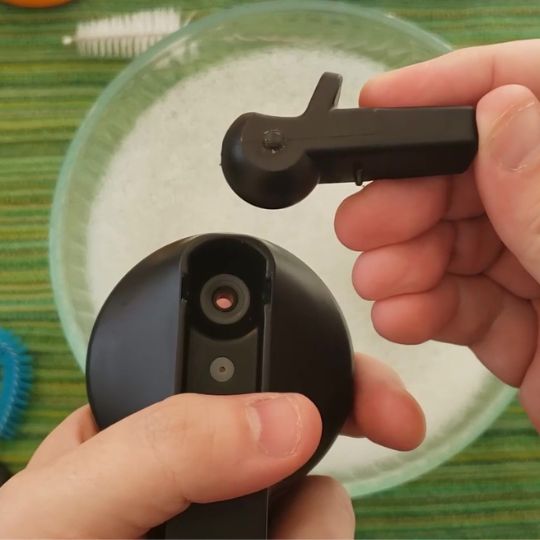
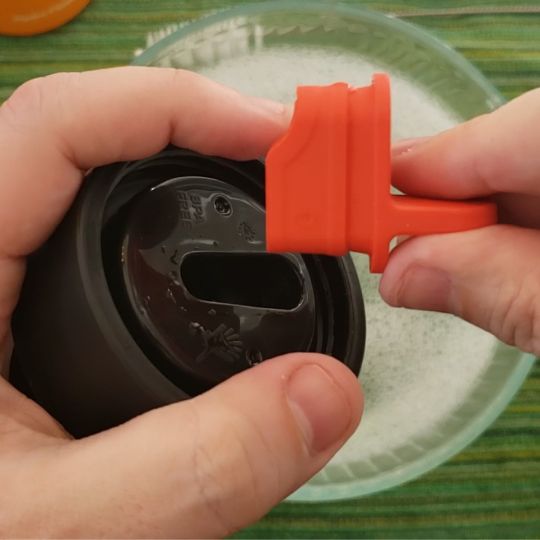
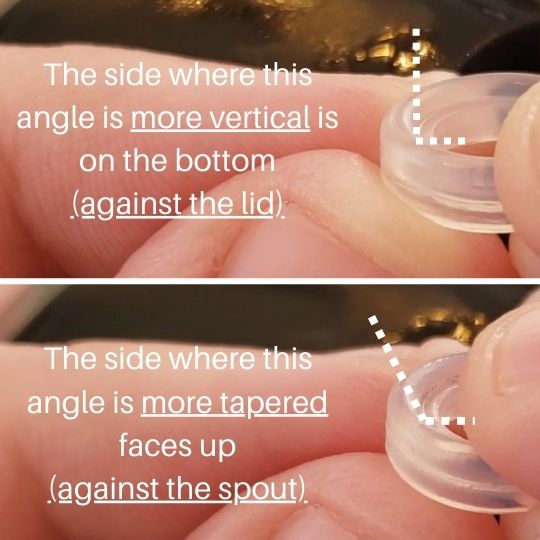
Slight Taper (Hard to See)
If you followed all of these steps, then you should be all set with your deep-cleaned Hydro Flask with the original-style straw lid!

How to Clean a Hydro Flask Straw Lid (Flex Straw)

Step 1: Disassemble the Lid
Next we’ll look at the Flex Straw lid, which is honestly the better version.  In some ways it’s easier to clean because the pieces are harder to lose, but it’s also a little trickier to take apart. Like before, the first step is to disassemble the lid.  Pull the straw out of the red silicone insert, then pull the red insert itself out from the bottom.
Pull out the Straw
Pull out the Straw
Pull out the Red Insert
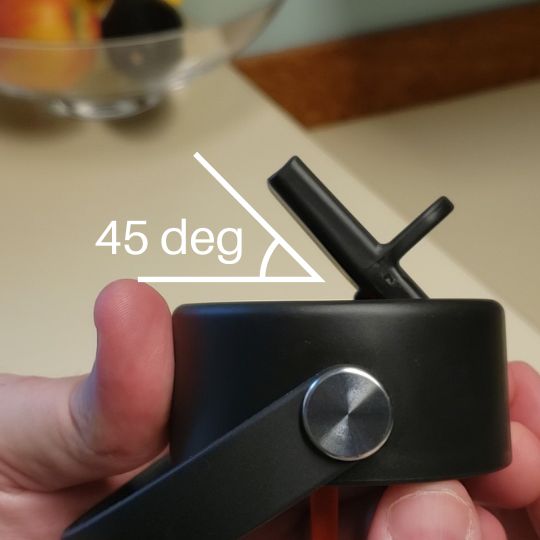
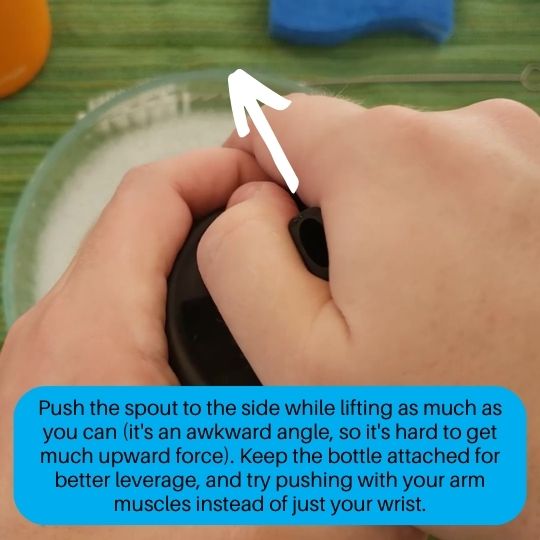
Detaching the spout is a little different and trickier compared to the old lid, but you can still do it.  Lift the spout to about a 45-degree angle, then press it to the side and up.  We like to keep the lid on the bottle for more leverage, and we put the spout between our thumb and index finger then push with our arm muscles and not our wrist.  The spout should then pop out of place.

It takes a lot more force that you have to apply at an awkward angle compared to the original straw lid.  You might even feel like you're about to break it, but follow these steps and it should pop out!
Lift the Spout to ~45 Degrees
Push Spout to the Side, Lift as Much as Possible
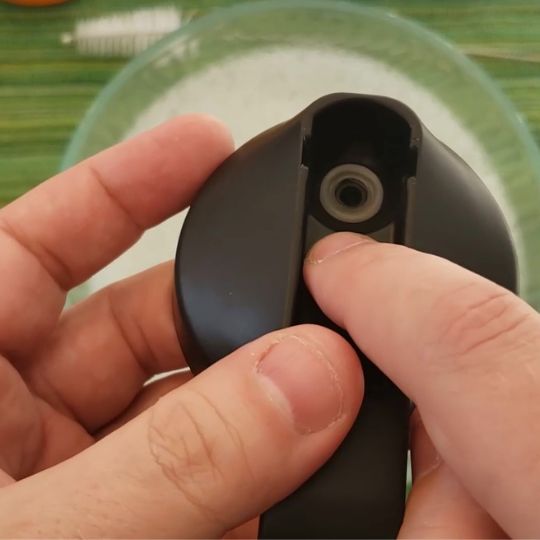
What the Detached Spout Looks Like
The last removable piece is the large o-ring up under the threads.  This seal doesn’t get as dirty so you may not need to clean it as often, but it’s still good to include in your deep clean every once and awhile.  It's much more difficult to get out compared to the original straw lid, and you’ll need to find a tool with a fine-tip end to get it out.  I couldn’t get it with a butterknife, but I was able to use the pointy end of this letter opener to get up under the seal and lift it, just making sure to only use the plastic part of the letter opener and not letting it go all the way to the blade.  I’m sure there are better tools out there, and if you find something that works great for you, please comment on it below to let us and other people know.
Removing the Large O-Ring
The Large O-Ring
The Large O-Ring
Step 2: Clean Everything
​Clean each piece thoroughly.
​
  1. Use the straw cleaner to get inside the straw, from both sides if your cleaner isn’t long enough.
  2. Use the detailing brush or toothbrush to clean up under the threads in those hard-to-reach areas.  The small brush in our recommended brush kit also fits perfectly into the opening where the red silicone insert goes.
  3. Clean the two holes in the red silicone insert with a straw cleaner.
  4. Don’t forget to clean inside the detached spout itself.
  5. We like to let each piece soak in the warm, soapy water for at least 15 minutes, take it out for a rinse, and then lay everything out on a towel to dry.
Step 3: Reassemble the Lid
Once it’s all dry, we put it back together the way it was before.  This should be pretty simple since you saw how it all came apart, but there are a few things to double-check to make sure you don't have too much leaking.
​
  1. Add the large o-ring first and make sure it’s properly seated to prevent leaking (see the image below).  This seal is difficult to get back into place, so be sure to double-check that it didn't get twisted around while you were re-inserting it.  We sometimes have to retry inserting it a few times before it's correctly in place without any kinks.​
  2. Insert the red silicone insert from the bottom.
  3. Pop your spout back into place
  4. Reinsert your straw.

After these steps, you should be good to go with your deep-cleaned Hydro Flask Flex Straw!
O-Ring Orientation
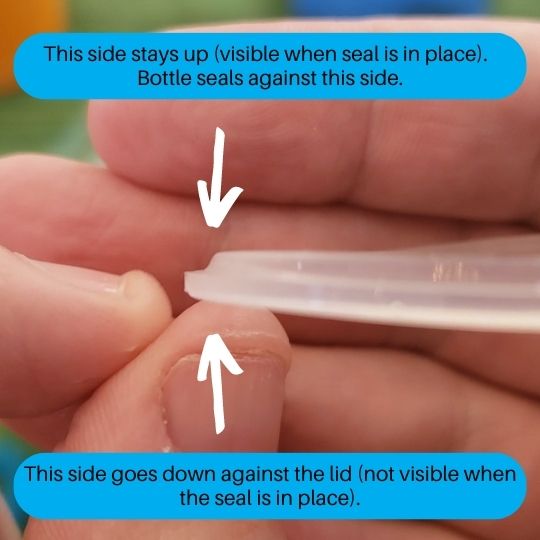
O-Ring Orientation

If you found this video helpful, let us know!  And thanks again if you make a purchase through one of the links in the description.  It really helps our small business out.  Keep BottlePro in mind for accessories for your large bottles, and happy hydrating!

Buying a Hydro Flask?  Keep us in mind

Check out our Amazon store for fun and helpful accessories, like fruit infusers, cup holder adapters, and carrying slings.
BottlePro's Amazon Store
See BottlePro's Store
0 Comments


Leave a Reply.

    Follow us for more hydration-focused updates!

      Subscribe for Updates and Product Deals!

    Subscribe

    Try searching for things like "infusers" or "hiking".


    Categories

    All
    Bottle Cleaning
    Bottle Protection
    Bottles
    Bottle Slings
    Coffee
    Cup Holders
    Fruit Infusers
    Healthy Lifestyle
    Hiking
    Hydration Products
    Hydro Flasks
    Ice
    Iron Flasks
    Klean Kanteens
    Soda Habit
    Splash Guards
    Tea
    Weight Loss
    YETI

    Archives

    February 2023
    January 2023
    December 2022
    November 2022
    August 2022
    July 2022
    June 2022
    May 2022
    April 2022
    March 2022


    Amazon Associates Program

    BottlePro is part of the Amazon Services LLC Associates Program.  We strive to provide helpful information and product recommendations, and we receive a commission on purchases made after you click through our links.
Contact Us/Returns
Refund Policy
Shipping Policy
Influencer Program
Wholesale Inquiries
Privacy Policy
Terms of Service
PS Kreative, LLC, Licensed in North Carolina, USA (ID # 2514262), DBA "BottlePro"
  • Home
  • Learn
    • Gear Reviews
    • Instructional Videos
    • Hydration Information
  • Shop
    • Cup Holder Adapter (3rd Gen)
    • Cup Holder Adapter (2nd Gen)
    • Splash Guard
    • Infusers >
      • FlavorFuze Pod
      • FlavorFuze Straw
      • FlavorFuze Steel
    • Carrying Pouches >
      • Leather Bottle Carrying Pouch
      • Neoprene Bottle Carrying Pouch
    • Cooler Dividers
    • Arm Rest Cup Holder
  • Demos
  • Hydration Blog
  • About Us
  • Contact Us