
 Why are Owala Bottles Popular, and Are They Actually Good? Are Owala Water Bottles Worth the Hype?(5 minute read time) Today let's look at a relative newcomer to the market, Owala. With 42,000 reviews averaging 4.7 stars on Amazon, it's clear there are a ton of people who love this bottle, and in fact it's been the most common brand I've seen in comments on our videos when people suggest which bottles I should check out next. So today let's take a deeper look at Owalas to see what's good, what's bad, and whether the hype is deserved. What's Next:
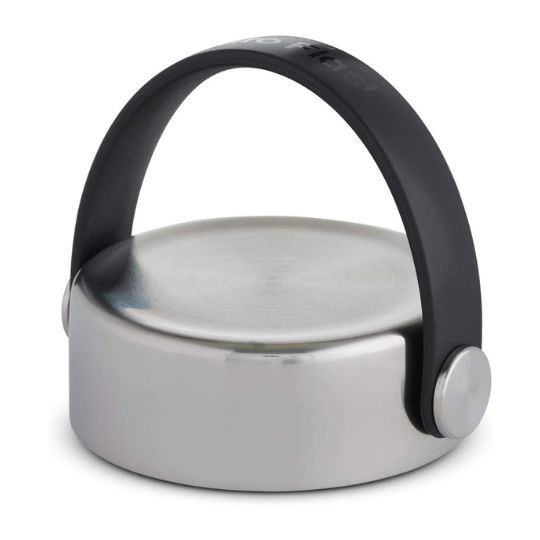
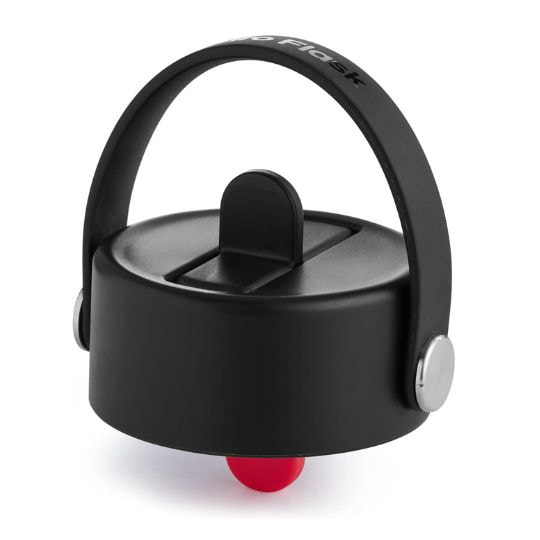
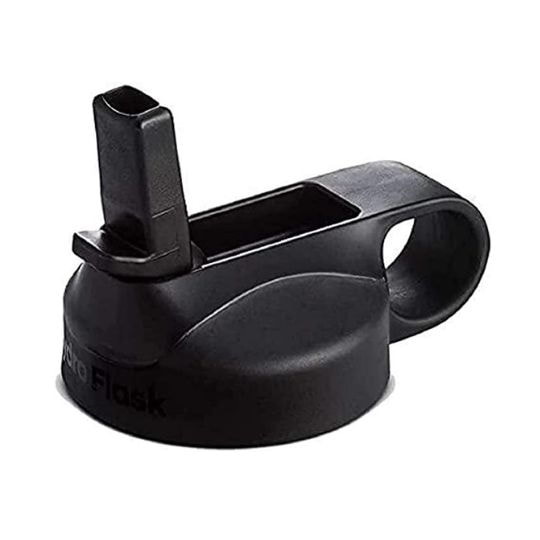
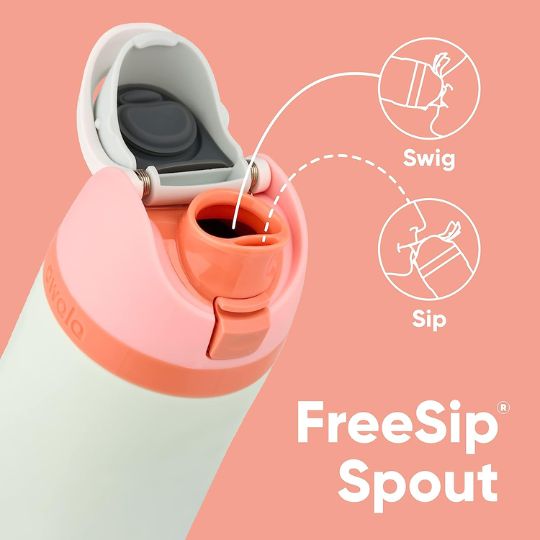
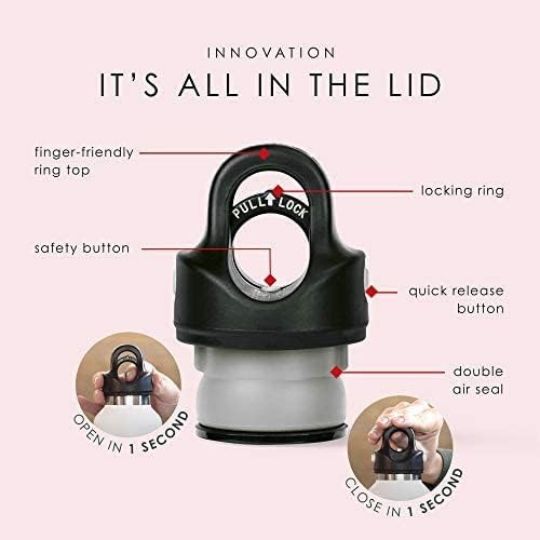
Video Review of Owala BottlesWe also cover this in a YouTube video if you'd prefer to watch the recap! Owala FreeSip Bottle SizesAs an Amazon Associate, we earn a small commission if you purchase after clicking a link. It doesn't cost you anything extra, and it really helps. Thank you! What Is Good About Owala Bottles?What is Owala's FreeSip Lid? First, let's look at the good side of Owala bottles. The most common feature you'll hear people talk about is the combination straw and chug lid, which is trademarked as their FreeSip lid and made Time Magazine's list of 200 of the best inventions for 2023. The ability to sip when you want a little water and chug when you want more is the main differentiator compared to other bottles that typically make you pick one or the other.  Owala's FreeSip Lid Ergonomics It's ergonomically designed around your mouth's shape, which doesn't sound important and is something you probably never would have thought about before trying it, but once you use Owala, it's hard to look at traditional straw bottles with those pivot-style rectangular spouts the same.  Owala's Ergonomic Spout Easy Sipping But the best part of this combination lid is the chug opening, but not for the reason you would expect. Most straw lids have a rotating spout that has a little plastic pin that goes into a little vent seal, so when you rotate open the spout, the vent opens to allow you to more easily take sips from the straw. The following two pictures are of Hydro Flask's Flex Straw and original straw lids. Both are similiar to most straw lids on the market because they have the plastic pin that goes into a small vent seal. The problem is that these types of lids still have a very small air vent, so the airflow is constricted and doesn't equalize as easily when you take a sip, making it a little more difficult and sometimes cause wheezing or popping noises.
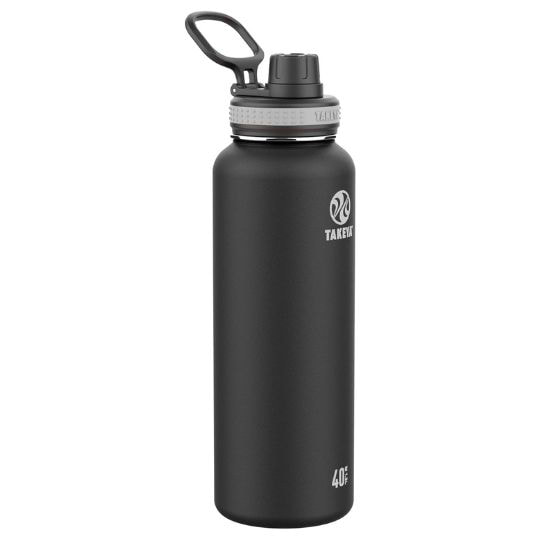
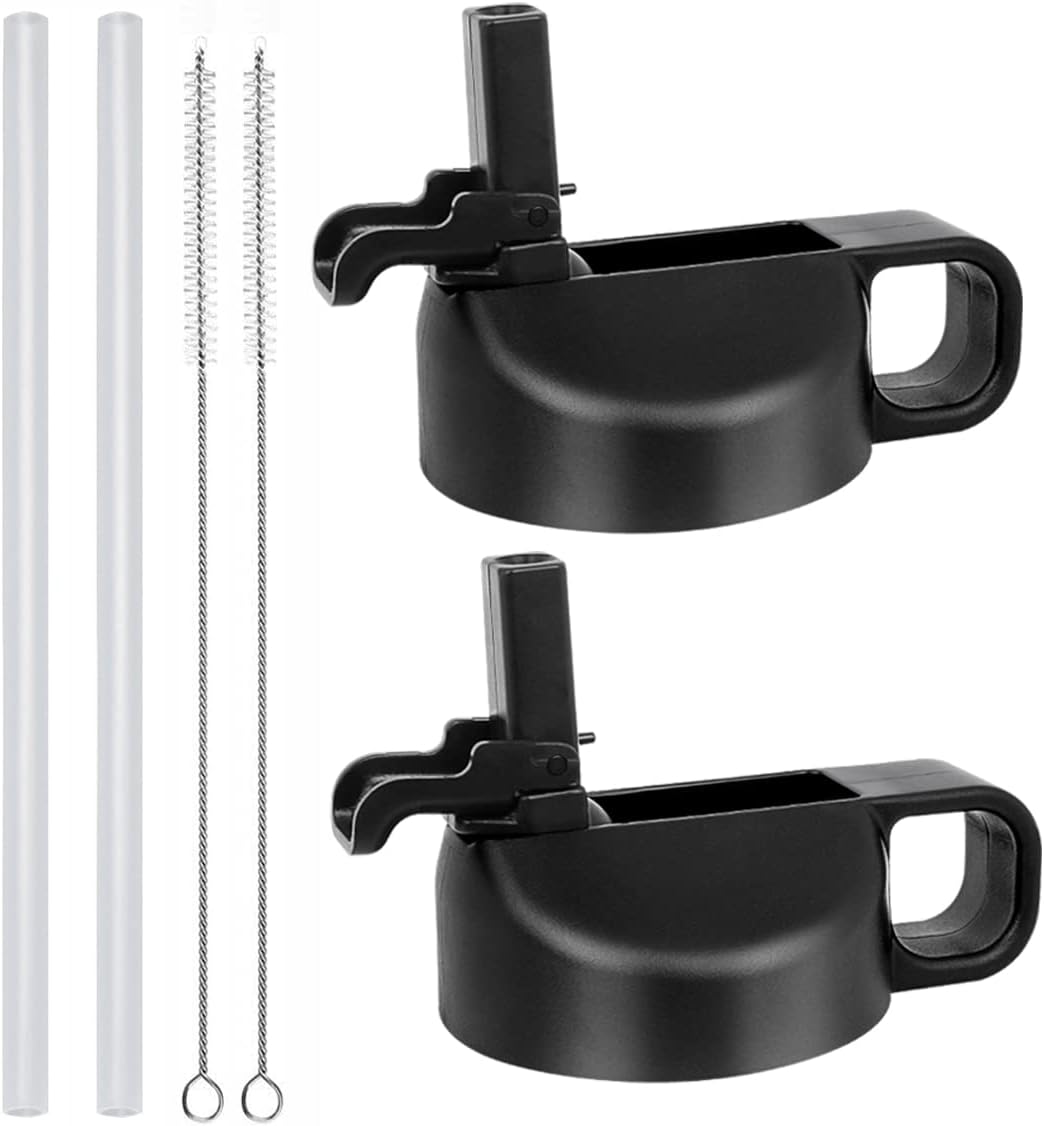
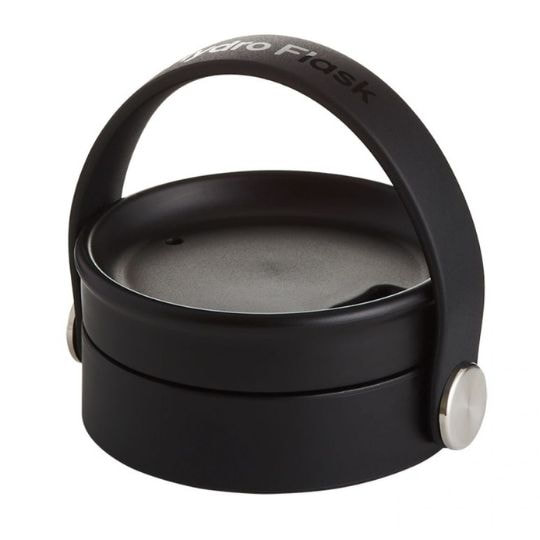
The chug opening in Owala's design acts as a wide open vent, which makes it ridiculously easy to take a sip of water. This is the main reason why I found myself exclusively using the straw side because it's so easy to drink from, and I'd be willing to bet that 90% of people do the same thing.  Owala's Chug Opening Doubles as a Vent Easy Cleaning and Prevents Dirt on the Drinking Surface The straw is easier to clean completely in all of its nooks and crannies, which is something that straw lids with rotating spouts are notoriously bad about. With traditional lids like in the next picture, you have to pop off the rotating spout to be able to clean the seal underneath, so many people don't do this often and some nasty buildup can occur. One notable exception is Hydro Flask's Flex Sip lid which as a silicone insert that essentially replaces that seal and makes it easier to clean. But there are still areas of that lid that are not possible to clean unless you pop off the spout. And notably, removing the spout can deform the connections a little over time, leading to a loose fit.  Traditional Straw Lids have Water Contact Points that are Difficult to Reach With Owala, the straw is fixed, so there isn't a rotating spout with a pivot point to clean around. This makes it much easier to clean everything. The silicone seal under the lid cover is also removable to make it even easier to clean. The lid cover goes over the entire spout area and is spring-loaded to open when you push this button, which means you won't have to touch the surface that your mouth will go on to open it up.  All of Owala's Water-Contact Surfaces are Easily Accessible Leak-Free The vent seal with pivot-style straw lids is a common leak point, but Owala avoids that issue. From my experience, this straw lid has been less likely to leak compared to traditional straw lids. Reasonable Price The standard price is very reasonable, and you can buy a 32 ounce bottle for $34. This contrasts with YETI or Hydro Flask who regularly charge $40 to $50 for a similar volume bottle.  Owala's Pricing (May 2024) Lead-Free More recently, Owala got another popularity bump compared to Stanley because their bottles are completely lead free, which is something Stanley and most bottles on the market can't say because of a lead-based solder that seals the vacuum. Practically-speaking the lead isn't a danger unless your bottle is damaged enough to expose the area between the two stainless steel layers, but some people rest easier knowning there isn't lead anywhere so it's worth mentioning.  Owala Doesn't Use a Lead-Based Solder Insulation (Sort-Of) The bottle also comes with triple-layer insulation, which includes both a vacuum seal to prevent conduction heat transfer and a copper layer to prevent radiation heat transfer. But while this is a benefit over non-insulated bottles, this reason alone isn't enough to consider Owala over other brands with vacuum seals, regardless of whether they are triple-layered or not. I did our standard 4 hour hot water test twice, and the results showed that Owala actually underperformed compared to similar bottles, even if they didn't have triple layer insulation. What's Bad about Owala Bottles?But like I say all the time on this blog, there is no perfect product for every person and every situation. Owala is no exception, and there are some negatives to be aware of. Handle For one, the hard plastic, two-finger handle is not great. For such an ergonomically-focused spout, the handle was really a disappointment for me because it really doesn't feel good when you're holding it. And the way I use and transport my bottle, the fact that the handle is also a lock for the lid cover is more annoying than useful, though I can see how that would be a benefit for people who would throw the bottle into a purse or a bag.
Harder to Close The lid can also take a decent amount of force to get it to close compared to some other types of lids, but is some ways that's good because it's necessary for a good watertight seal. This is certainly not a big deal, but it was noticeable.  You Have to Press more Firmly to Close Compared to some other Straw Lids Exposed Plastic under the Lid There is also exposed plastic under the lid and in the straw, so your water will come into contact with plastic. It's worth noting that these plastics are BPA free and allegedly safe by today's standards, but given the history of plastics and how sometimes new issues come up after years of research, I don't fault anyone for wanting to avoid plastic altogether.  No Available Options for All-Stainless Steel Water Contact Points Dirt Magnet One other very nit-picky issue is that I found the grippy, textured area around the flip cover to be a dirt magnet, so while you should always stay on top of cleaning the inside of your bottle regularly regardless of which one you own, you might find yourself scrubbing this part of your Owala more frequently too.  This Flexible, Grippy Part Attracted Dirt More Easily Colors (Sort Of) And lastly, this may be an unpopular opinion, but for me, I can't stand most of the color combinations. To me, it looks like they blindfolded someone and told them to throw darts at a board with different colors. It's like walking into a Home Depot, they ask what paint color you want, and you say "yes." That may be a little harsh and many people love the combos. That's perfectly OK! But most of the colors are a little too funky for my taste. Then again, I'm fully aware that I've never been accused of being a stylish trend-setter, and I'm willing to concede that the colors are a big draw for many people.  Owala's Color Combos Summary: Are Owala Bottles Worth It?Overall, Owala really does have a solid product offering. The FreeSip lid is one of those things that makes you wonder why it wasn't invented before, and the benefits far outweight the negatives in my opinion. So if you're in the market for a straw lid, consider giving Owala a try. There's a good chance you won't want to go back to traditional straw lids every again.
0 Comments
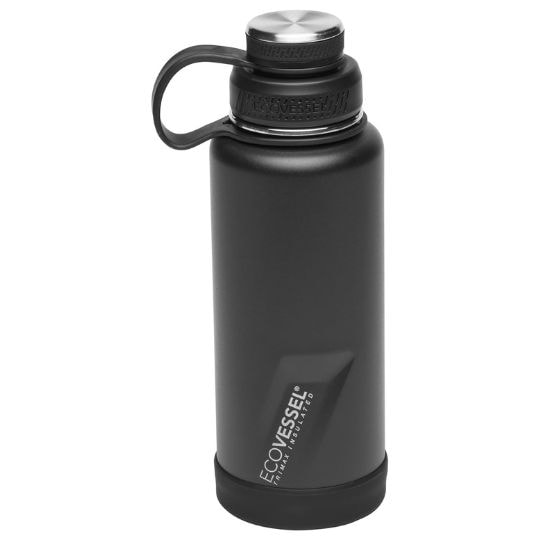
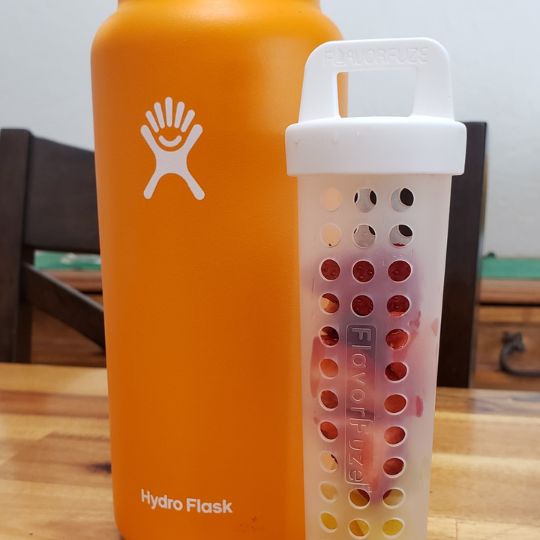
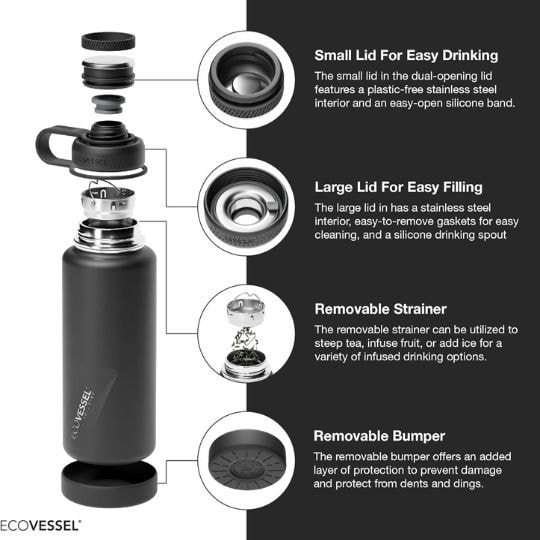
 What are the Best Bottles and Accessories for Infusing Water with Fruit, Tea, and Coffee? What are the Best Bottles for Infusing?If you're like me, you get bored drinking regular, plain water all day. I used to be addicted to sodas, so switching from extremely sugary drinks to water was a big shift. The thing that helped me the most was adding my own flavors. Now, technically sodas are flavored water with carbonation and you can also add flavor with enhancers like Mio, but for the purposes of this video I'm calling flavored water anything that gets its taste from more natural sources like fresh fruit, loose-leaf tea, or coffee grounds. And at the end, I'll also give my take on two bottle brands that have more recently taken social media by storm, Cirkul and air up. (spoiler alert, it might not be positive) Video Review: Which Bottles are Best for Infusing?We also cover this in a YouTube video if you'd prefer to watch the recap! Links to Products: As an Amazon Associate, we earn a small commission if you purchase after clicking a link. It doesn't cost you anything extra, and it really helps. Thank you! Adding Fruit Directly into Your Bottle (No Infuser)First, I have to mention the most obvious way to flavor your water, and that's simply by adding fruit like lemons, cucumber, mint, or a whole range of other flavors directly into your bottle! This works well enough, but the problem is that you ideally would have some way to strain it so it's not a good option with most bottles. The good news is that more and more bottles are coming to market with built-in stainless steel strainers at the lid. For stainless steel, EcoVessel is one brand that's been around awhile, and for glass, Mayu is a brand I've mentioned a few times on this channel. Just add your fruit, snap the strainer into place, and you're good to go. It's also worth noting that these strainers double as ice-blockers, which can be a life-saver when driving in particular.
Bottles with Built-In InfusersSome brands take the built-in strainer a step further by having a larger strainer that screws into the smaller one, which makes it a better option for tea or coffee. It's also a good option if you want your fruit to be contained instead of free-floating. Notably, none of the "major" brands that I'm aware of currently have bottles with built-in infusers, including Stanley, YETI, and Hydro Flask. We would not be surprised if they come out with options within a few years, but for now you'll have to go with lesser-known brands or add-on accessories (see further down the page). The first brand I tried with a larger infuser was Steepware, but honestly I'm not too much of a fan of this bottle. It did the worst by far on an insulation test, and the handle isn't anything to write home about. A much better all-around option is a new brand I came across called Vesmoon. Now to be clear, there do appear to be other similar bottles with the same size strainer coming to market, but this is the one I've tested in person and I'm a pretty big fan. Unfortunately, Vesmoon was not available for purchase as of 6/2/2024. This is sometimes a problem with brands that are smaller and newer because the water bottle market is incredibly competitive But there are other options on the market today, and these ones by Hemli and Akvati look to be comparable. Stanley Bottle with a Fruit InfuserNow I'm not a huge fan of Stanleys, but I recognize many people love them. Unfortunately, Stanley does not have a fruit infuser bottle option at this time, though a good alternative is from a brand called Fimibuke. It's essentially a Stanley knockoff with a large built-in infuser for one third the price, and while I can't say much about the company or brand itself, the design and functionality look pretty solid. Best Bottle Infusers for Fruit InfusingLlet's say you're in the market for an add-on infuser because you don't want to buy an entire new bottle. Well, there are a few options you can look at. Let's start with ones for fruit, which generally have larger openings that work well for fruit but not for loose leaf tea or coffee grounds.
Best Bottle Infusers for Tea and Coffee InfusingNow each of the add-on infusers I mentioned is made with either plastic or silicone, so let's look at some stainless steel ones, which can be used for fruit but are also better for tea and coffee because they have a finer mesh strainer.
Bottles with Flavor Pods (Cirkul and Air Up)And finally, let's take a look at the two elephants in the room that have taken social media by storm recently, Cirkul and air up. They each have flavor pods, but they work very differently.
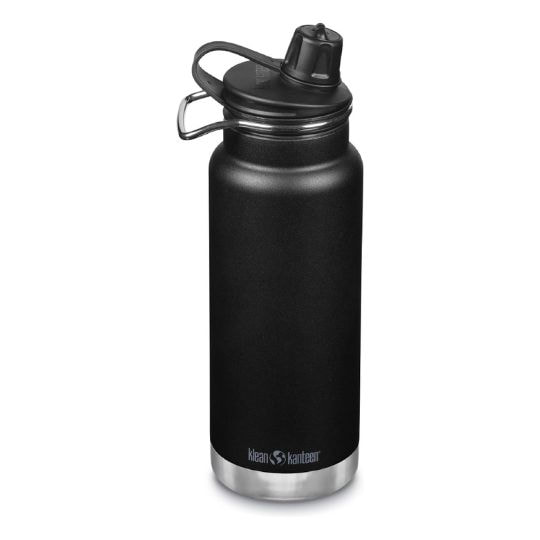
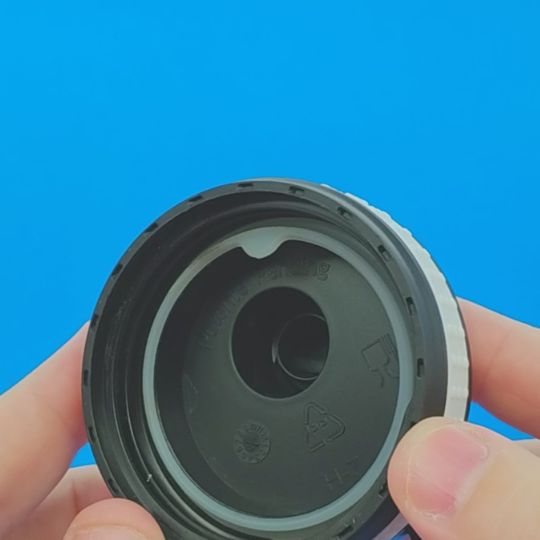
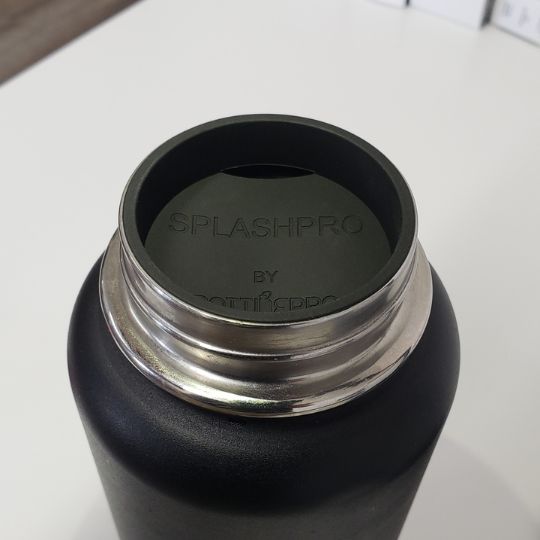
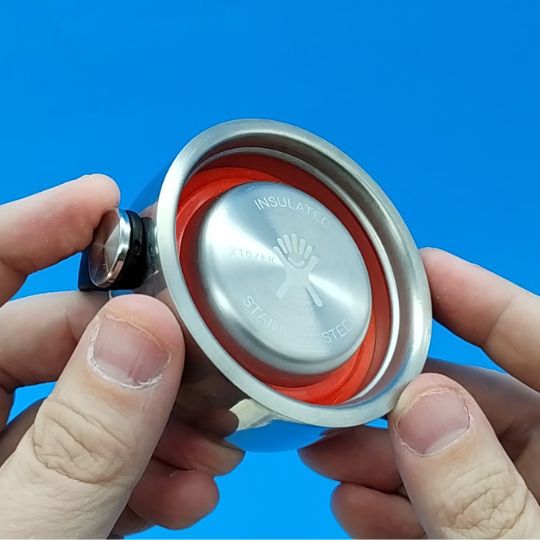
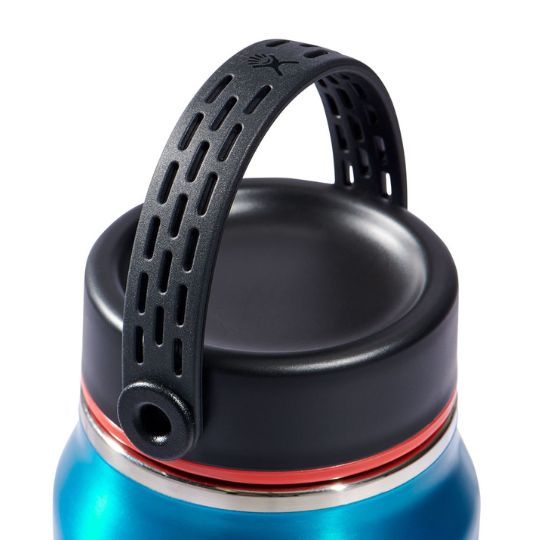
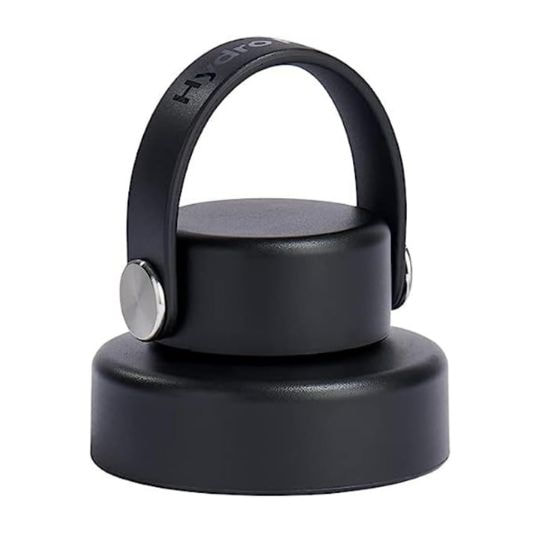
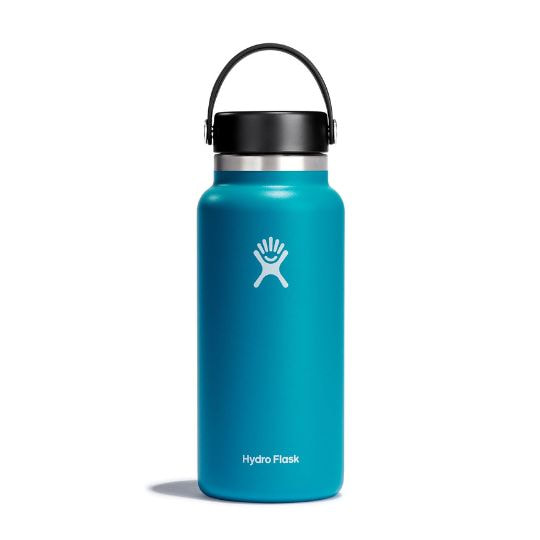
 Which Bottles Completely Avoid Plastic Contact With Your Water? Which Bottles Avoid Plastic Completely?Today we're exploring the question, which bottles completely avoid plastic contact with your water? You might think going with a stainless steel bottle like a Hydro Flask, YETI, or Stanley would be fine, but the vast majority of bottles still have exposed plastic under the lid. So what can you do? The good news is that there are an increasing number of brands with options that completely avoid plastic on the inside. Water Bottle Options Covered Next that Avoid Plastic Contact with Water: #1: Hydro Flask's Stainless Steel Flex Cap #2: Healthy Human #3: Klean Kanteen #4: EcoVessel #5: Glass Options (Mayu and Sunkey) Video Review: Which Bottles Avoid Plastic?We also cover this in a YouTube video if you'd prefer to watch the recap! Links to Products: As an Amazon Associate, we earn a small commission if you purchase after clicking a link. It doesn't cost you anything extra, and it really helps. Thank you! Which Lid Styles Avoid Plastic?As a general rule-of-thumb, you're typically going to have to use the type of lid that you have to screw all the way on and off to take a sip ("Standard" type shown below). Each brand has a different name for it, but you'll normally need to avoid straw, spout, and sip style lids. They have more moving parts and connections that make it more difficult to make a lid that's completely stainless steel on the bottom.  Common Water Bottle Lid Styles Option #1 - Hydro Flask's Stainless Steel Flex Cap ("Flex Steel")
 Hydro Flask's Flex Cap vs Stainless Steel Flex Cap ("Flex Steel") Option #2: Healthy Human
 Stainless Steel Under Healthy Human Lid Option #3: Klean Kanteen
Option #4: EcoVessel
 EcoVessel's Chug Style Lid Option #5: Glass Bottles by Mayu and SunkeyThat's it for what I've seen from stainless steel bottles, but what about glass? Lifefactory is one of the biggest names in glass bottles, but as far as I can tell all of their lids have exposed plastic. So you'll have to look at some other brands like Mayu or Sunkey. These names don't carry the same weight as one like Hydro Flask, but I woudn't be surprised if a glass bottle brand takes over the social media landscape in the next few years in the same way that Hydro Flask, YETI, and now Stanley have over the last decade. It just seems like more and more people are looking to avoid stainless steel too, especially after all the recent media attention about lead. 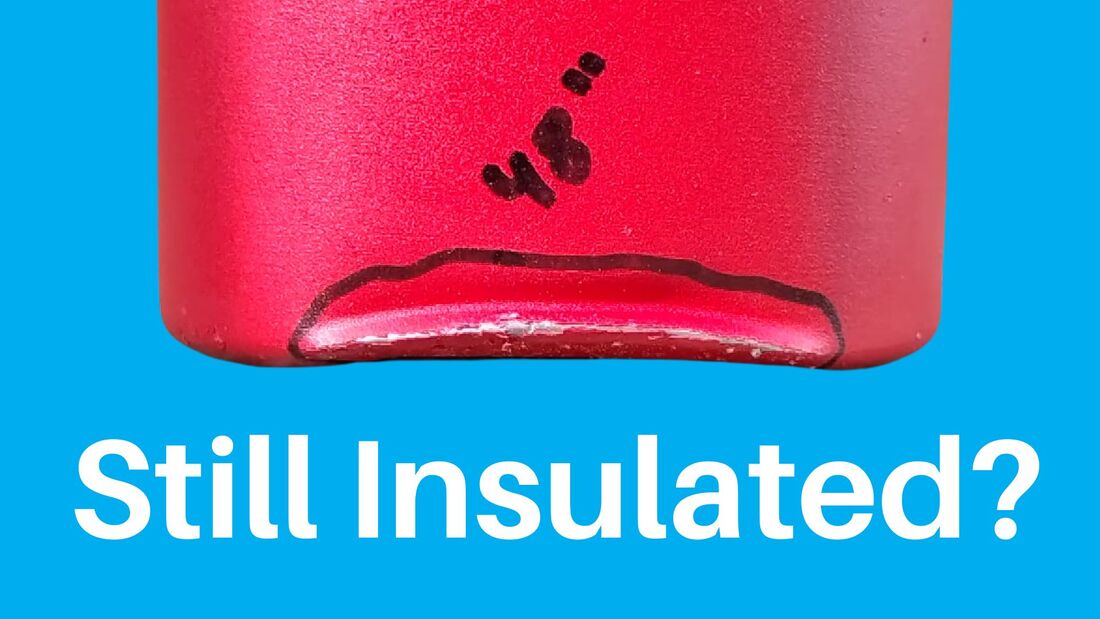 Do Dents Affect Your Bottle's Insulation? Do Dents Affect Your Bottle's Insulation?Today we're exploring the question, will a dent affect your bottles insulation? Unless you have Spiderman-like reflexes, inevitably you will drop your bottle. Plastic bottles like Nalgenes will be fine, but dual-wall stainless steel bottles are a different story. Steel is a very strong and durable material for water bottle construction, but one major downside is that it is prone to denting. Many of these water bottles are not exactly cheap, costing as much as $50 for larger bottles from brands like YETI and Hydro Flask. So if you've invested in a brand you love, you want to know that your insulation still works, right? The truth is that dents CAN affect your bottle's insulation, but it's not as simple of a question to answer as it may seem at first. The location and size of the dent play a role, so there are more things to consdier than you might expect. So today we're exporing the question, "which dents affect your bottle's insulation?" Coming Next:
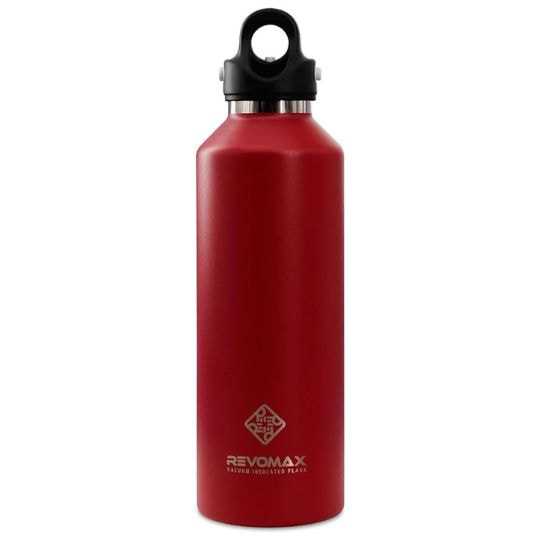
 The Inside of an Insulated Bottle (RevoMax) Video Review: Do Dents Affect Your Bottle's Insulation?I recently posted two videos about this test. One that's a 3-minute recap of the most important details, and another that's a full-length 18-minute video showing more of the testing footage and general information about these types of bottles. They each cover similar info as this post, so check those out if you'd prefer to watch the recap!
How Do Dual-Wall Insulated Bottles Work?Heat transfer through three primary methods:
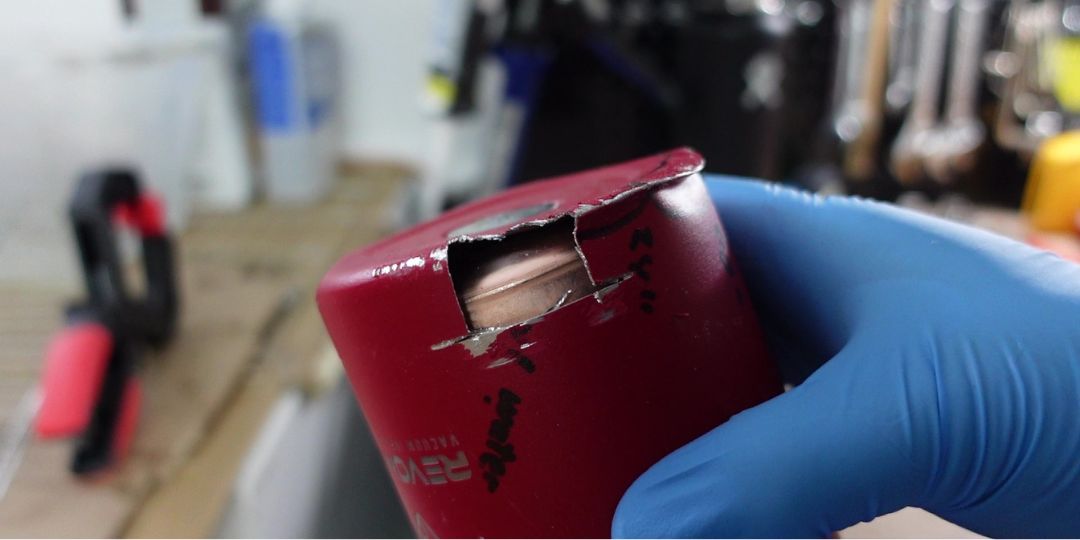
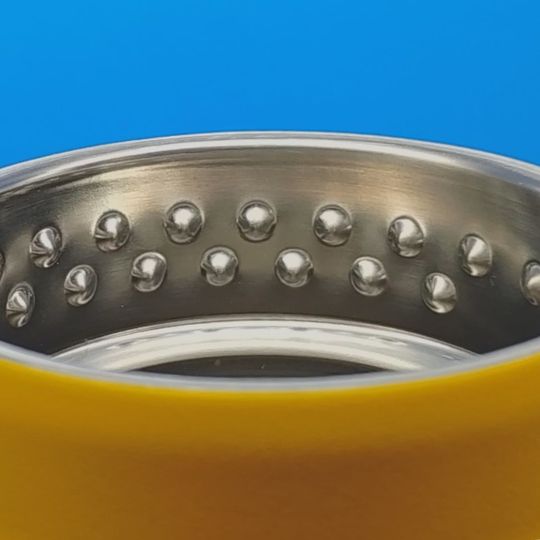
Dual wall bottles work so well because they have a vacuum between the two stainless steel layers. Of the three heat transfer methods, only radiation is able to work through a vacuum. So when you have an intact vacuum, you're able to limit heat transfer in (or out) of your bottle. Another type of bottle you will see more and more commonly is what's normally referred to as a "triple-layer" bottle. These types of bottles have the same general construction as dual-wall bottles, but they add a copper coating to the outside of the inner stainless steel layer. The idea is that copper is better at limiting radiation heat transfer than steel, so this further improves the insulation properties of your bottle. To show you, I cut into a Hydro Flask (dual-wall) and a RevoMax (triple-layer with the copper coating). Fun fact, in the video you can actually hear the air rushing in to replace the vacuum when I cut through the Hydro Flask!
Do Triple-Layer Bottles Work Better Than Dual-Wall Bottles?
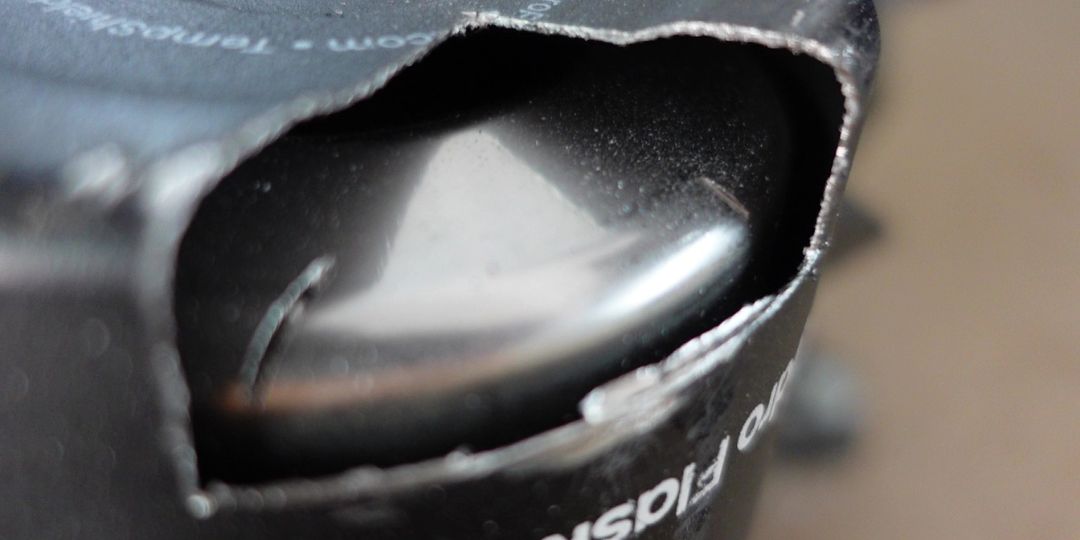
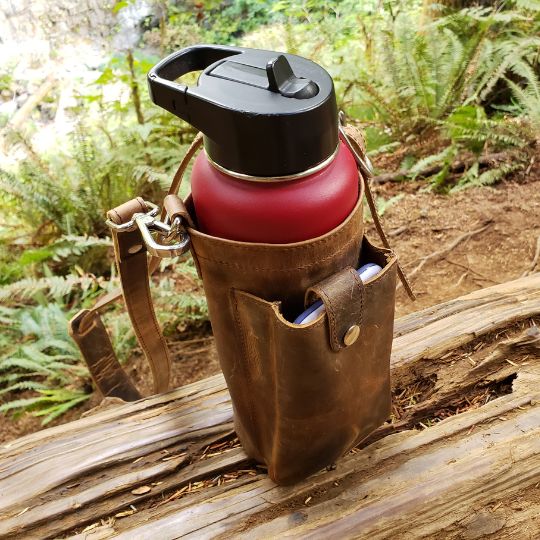
Where Is The Worst Place On Your Bottle To Get A Dent?From cutting open these two bottles, I found that the spacing between the two layers is much wider on the bottom compared to the sides. So your bottle can have bigger dents on the bottom and still hold its insulation, which is probably by design because the bottom is the most likely place to get a dent. But if you are unlucky enough to drop your bottle on its side onto a rock or something else that dents it there, then the dent doesn't need to be as deep to create a contact point between the two layers. 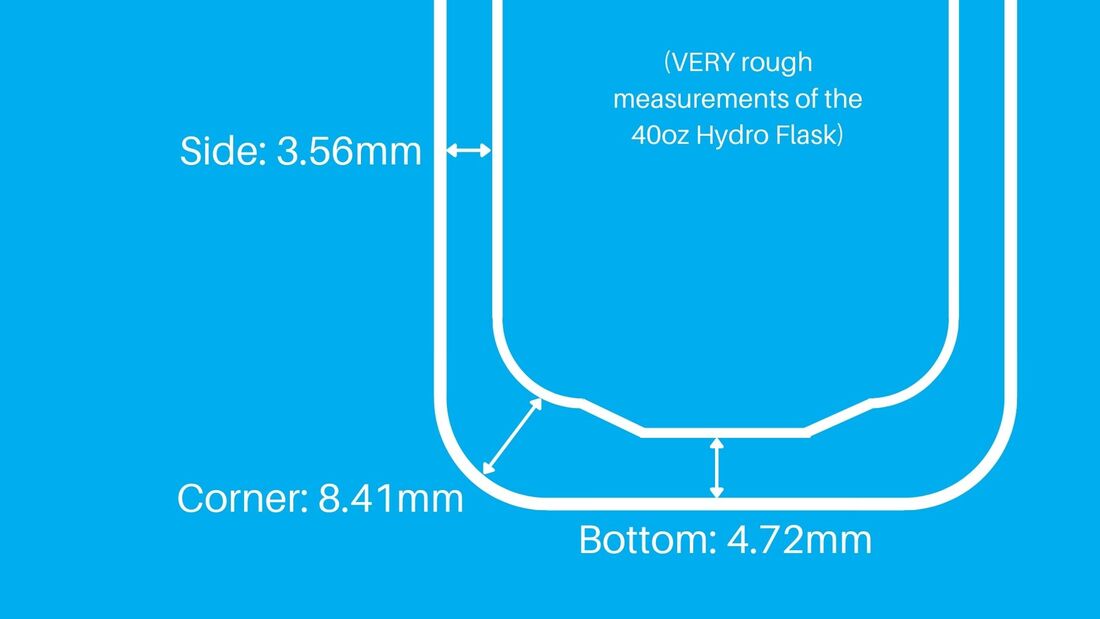 Approximate Spacing Between The Two Steel Layers In A 40oz Hydro Flask How Big Does A Dent Need To Be To Affect Your Bottle's Insulation?It's not just the location of the dent, but also the severity that matters. Insulation Failure A: Gradual Decrease Smaller isolated dents can create contact point between the two steel layers. Any contact point like this is going to be a pathway for heat transfer through conduction, so these dents can affect your insulation. But the good news is that your bottle will still have good insulation around the majority of it, so it won't be a complete failure. 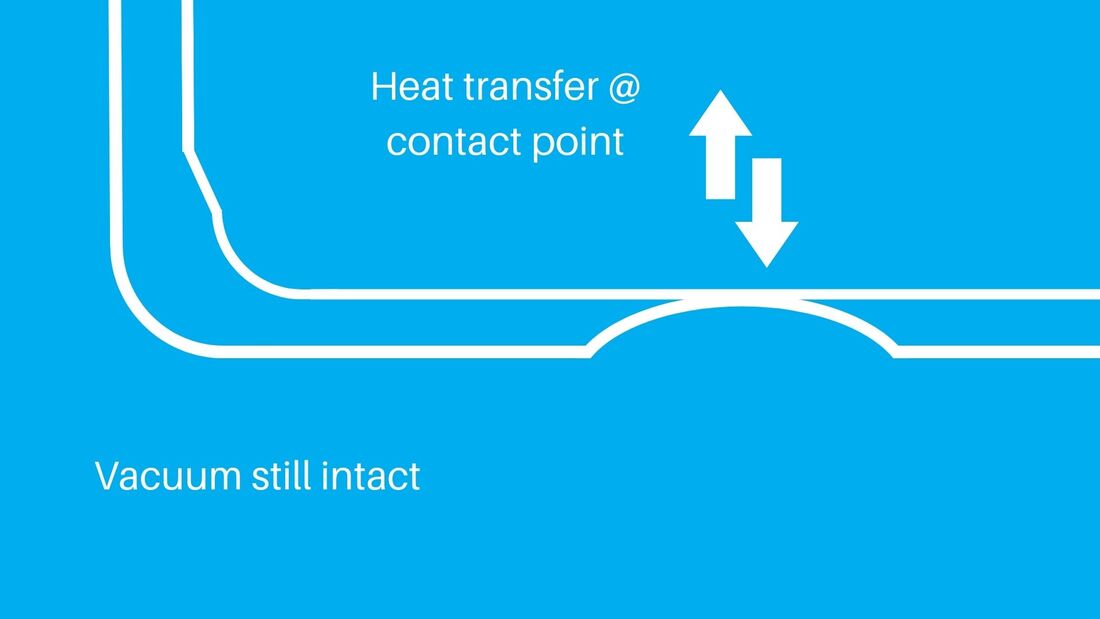 Small Dents Can Create Contact Points for Conduction Heat Transfer Insulation Failure B: Complete Loss (Vacuum No Longer Intact) Worst-case, you might get a larger dent that cuts through the outer layer of steel. This allows air to enter the space between the steel layers to replace the vaccum, and then your bottle will be not better at insulating than a single-wall bottle. 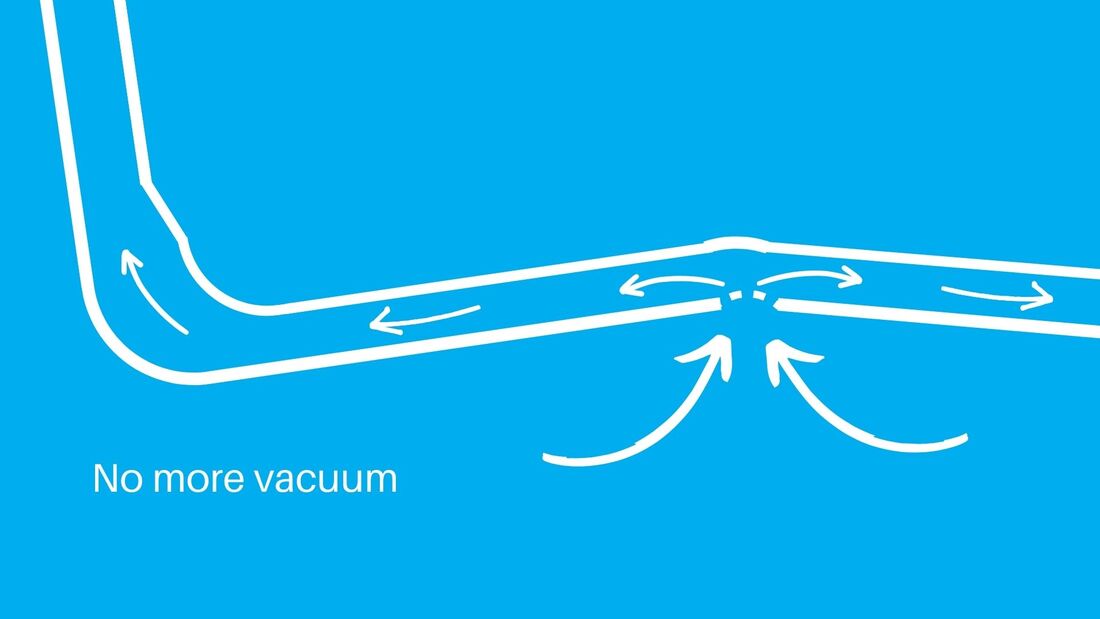 Large And/Or Compound Dents Can Lead To Complete Insulation Loss Insulation TestsNext, I stress tested a RevoMax bottle by dropping it from increasing heights. I did a 4 hour insulation test before the test and after each drop. The bottle took A LOT of damage before the insulation was effected, even including some dents with extreme buckling and folding of the steel. The bottle still had the same insulation after 12", 24", 36", and 48" drops. 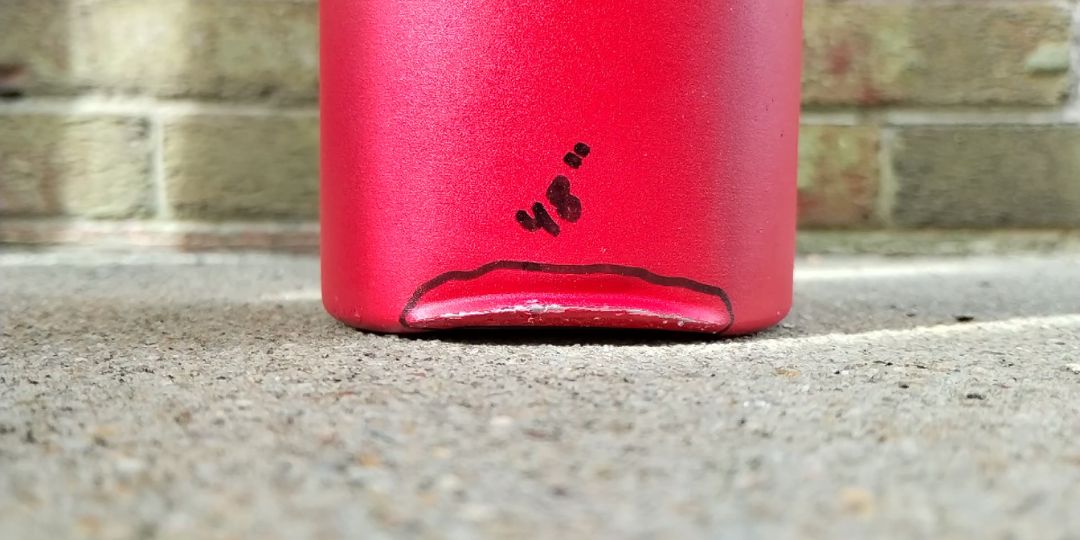 Buckling From The 48" Drop Full Of Water (Held Insulation) Eventually the insulation was completely compromised (Failure B mentioned above) after the 60" drop. This occurred when multiple dents with severe buckling overlapped, and that overlapping area is where there was too much repeated strain on the steel to the point that it cut through the outer layer. 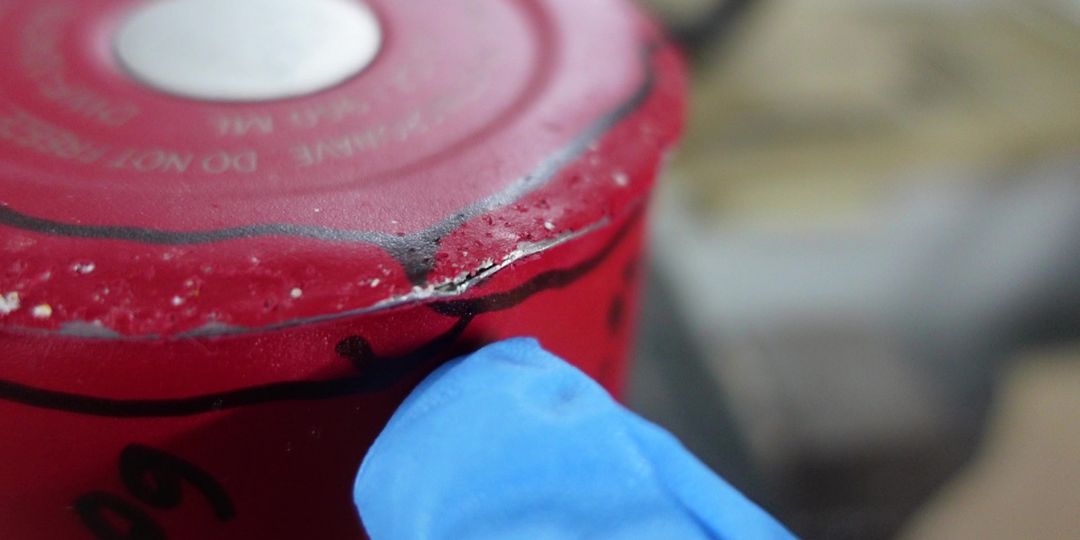 Overlapping Dents After 60" Drop (Lost Insulation) So the main reason the insulation failed is because the compound dents overlapped. I wouldn't be surprised if the bottle would have held insulation after a single 60" drop. Conclusion: Do Dented Bottles Hold Insulation?In the vast majority of cases, YES! The bottom line is that you probably don't need to worry about your bottle's insulation being compromised by a dent. Most dents, even really severe ones, are not large enough to affect the insulation. Plus, the vast majority of people will replace their bottle before the insulation is affected because large dents can make the bottle sit wobbly, which is pretty annoying. But if you like to hang onto your bottles longer than the average person and you start to get overlapping major dents, that's when you would be more likely to start seeing your insulation get worse or potentially even competely fail. Do Your Own Insulation Test!But if you have any doubts, do an insulation test. Fill your bottle with the hottest water from your sink, measure the temperature, then let it sit for about 4 hours and measure it again. If the temperature dropped less than ~10 degrees F, your insulation is still probably good. More than ~10 degF and you might have a problem. 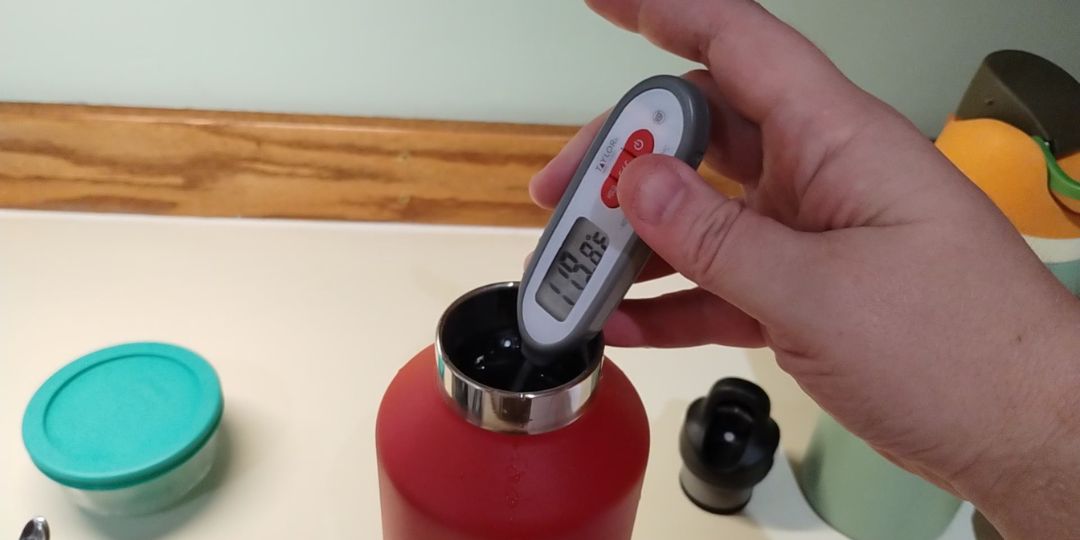 Doing An Insulation Test With Your Bottle How Do You Protect Your Bottle's Insulation?Other than never dropping your bottle EVER, there plenty of effective, easy options to keep your bottle protected and insulation as-designed. Here are a few to consider:
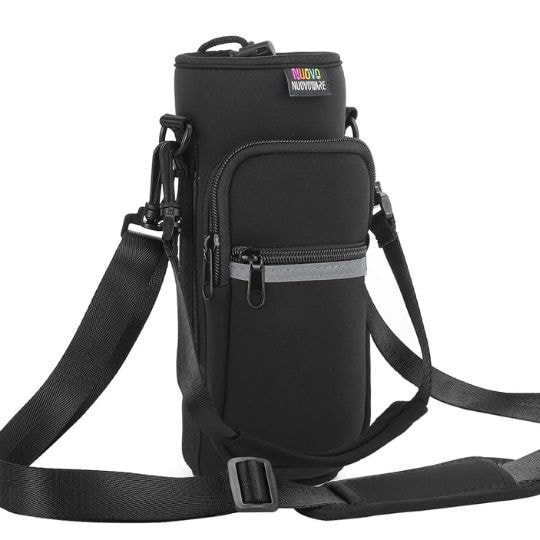
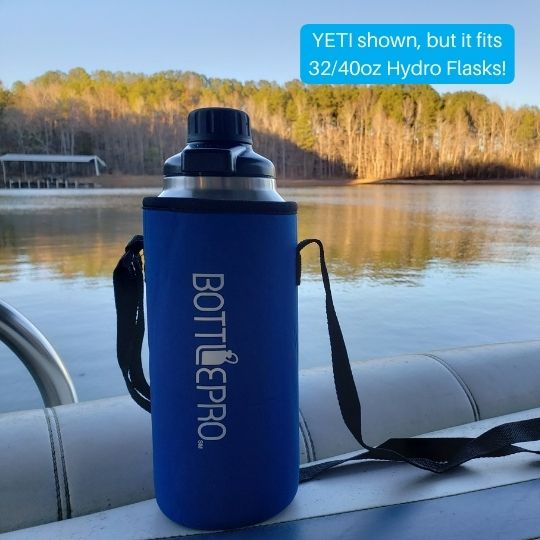
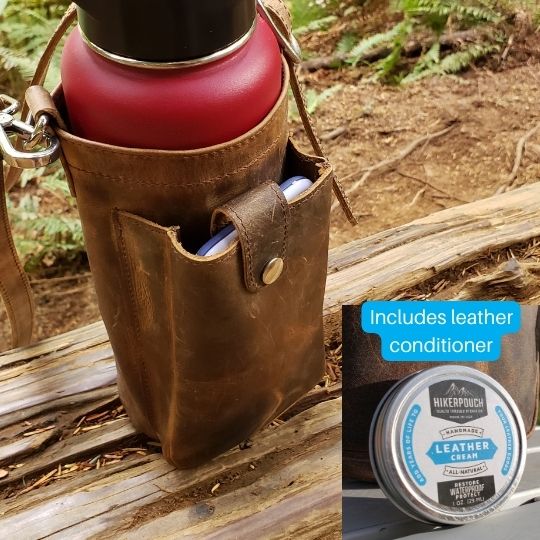
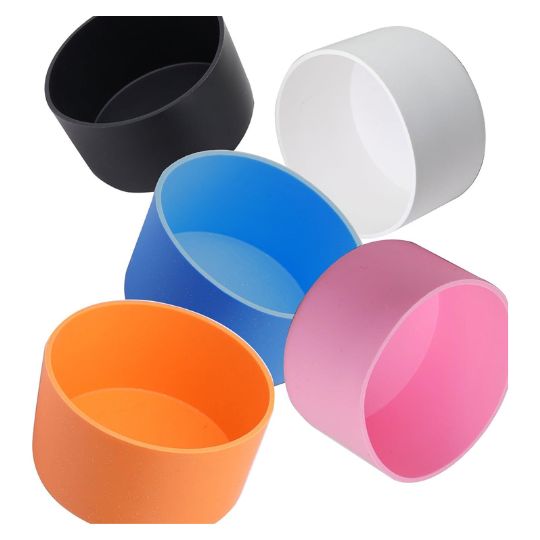
Good All-Around Sling for Many Bottles Slings for 32 and 40oz Hydro Flasks Bottle Boots 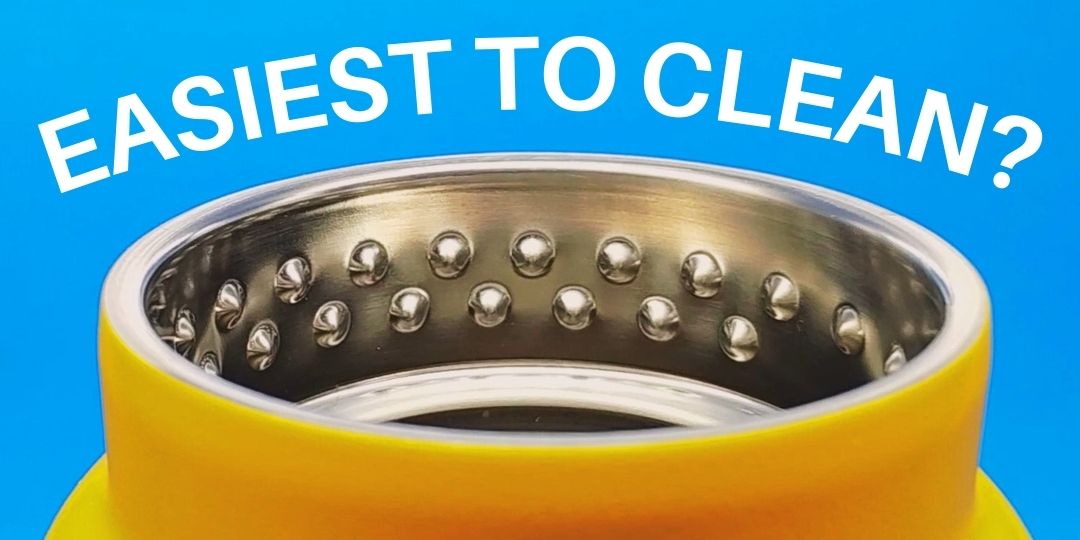 Best Water Bottles for Cleaning What is the Best Water Bottle for Clean Freaks?Let’s face it, reusable water bottles are amazing for many reasons, but they’re also great at hiding bacteria and germs. So today, let's look at some bottles that have features designed specifically to make it easier to keep them clean. In this post, I’m only going to cover dual wall vacuum insulated stainless steel bottles because they're some of the more popular bottle in today's market. LONG STORY SHORT Here's the summary of the bottles. Keep reading for more details about each one!
Water Bottle Cleaning TipsBefore we dive into specific bottles, let's start with some general water bottle cleaning tips and guidelines.
Can You Use your Dishwasher to Clean your Bottle? Many bottle manufacturers state that their bottles and lids are dishwasher safe, which at first makes this seem like a great option. Besides, why go through all the work of using a bottle brush and cleaning tablets when you can let the dishwasher do everything? Different people will have different opinions, but here's ours. For the most part, we do not recommend putting reusable bottles or accessories in dishwashers. These bottles can be expensive, so we think it's better to take a hands-on approach to make sure your bottle is cleaned sufficiently while minimizing the chances that it could get damaged or chipped from knocking into something else while your dishwasher is running. Also, you'll probably want to remove and hand-wash the seals anyways periodically because the dishwasher won't be able to get all around them. And it's not always clear which products are really dishwasher safe. For example, newer Hydro Flasks are dishwasher safe, but older ones are not. For the average user, it can be confusing or difficult to really know, so we generally like to play it safe and recommend handwashing. What are the Easiest Water Bottles to Keep Clean?Let’s move on to some bottles that have features designed specifically to make them easier to keep clean, and at the end I'll give my overall recommendation. Bottles with Internal Threads
Bottles with No Threads
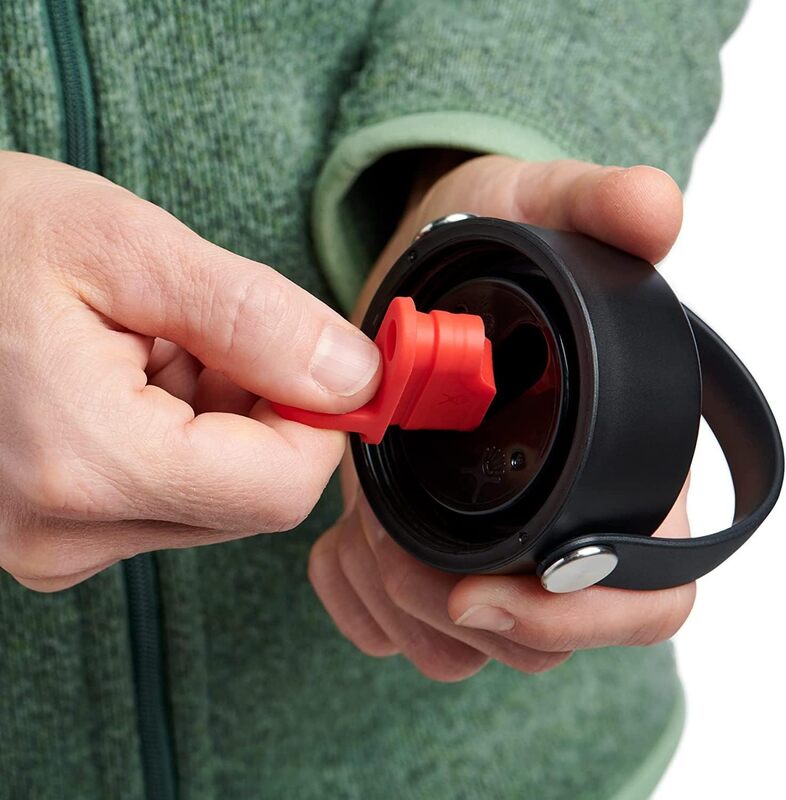
Bottles with Seals with Pull Tabs
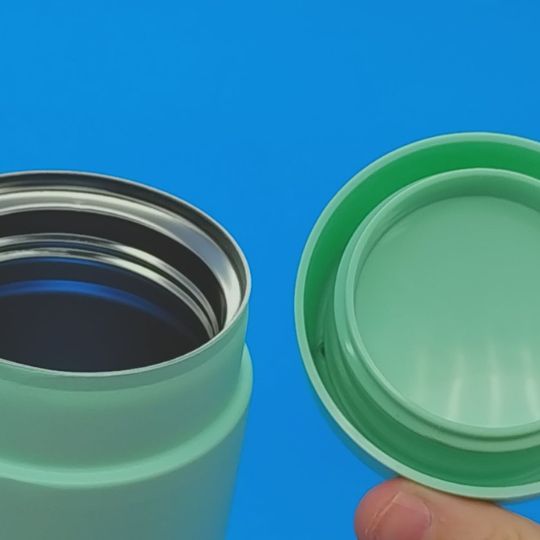
Bottles with Removable Bottoms
Bottles with FiltersThere are a ton of filter bottles and accessories to choose from at this point, and while they don't help clean your bottle, they do help clean the water you'll drink so they are worth mentioning. A few include Lifestraw, Simple Modern, and Brita. I'm planning another post later this year where I'll compare different filter options, so I'll have much more info about this subgenre coming soon. Bottles with UV LightEasiest Straw Lids to Keep Clean
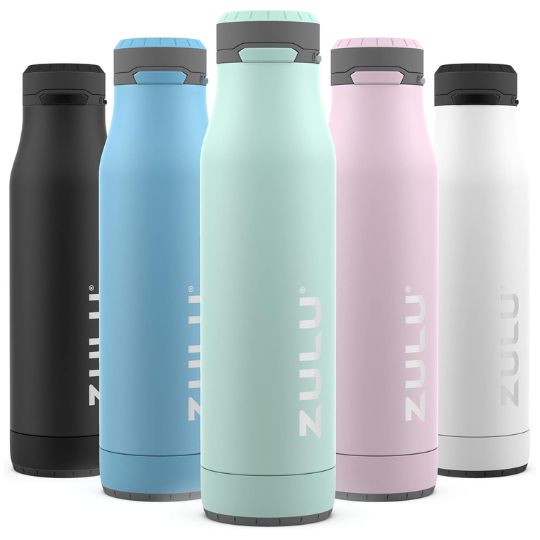
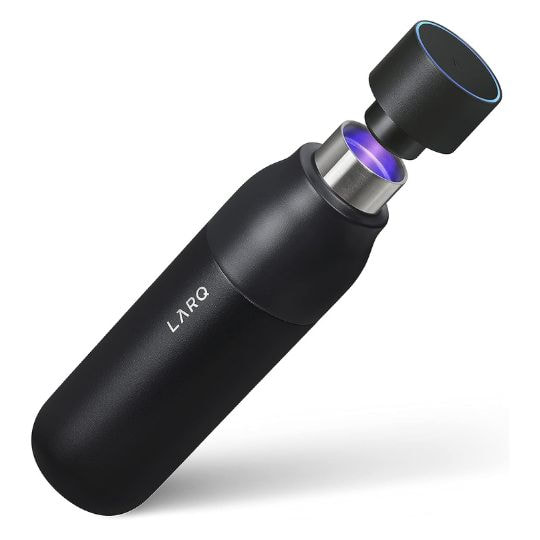
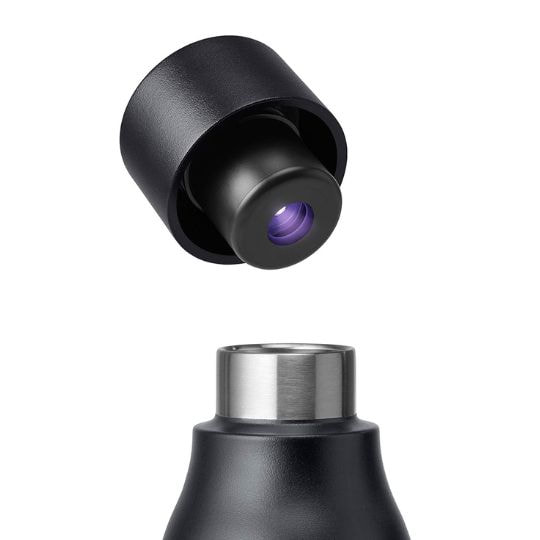
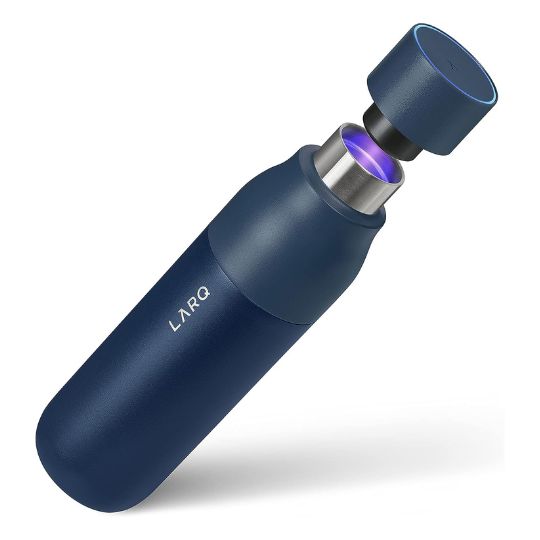
Conclusion: What is the Easiest Bottle to Keep Clean?From an objective standpoint, it's hard to beat the LARQ bottle because UV light is proven to kill bacteria and viruses. Of course that doesn't replace cleaning with a brush and bottle tablets, but it's an extra step to santize your water that the other bottles simply don't have. But for over $100 for the 25oz bottle, it's understandably outside of most people's price point. So for most people, Zulu Ace is probably the best choice. Being able to take off both sides of the bottle makes it so much easier to make sure you're cleaning the bottle thoroughly, so we'll give the nod to this one for anyone who prioritizes cleaning your bottle over everything else. But ultimately, you can make any of these bottles work if you have a good brush kit, use cleaning tablets periodically, and develop a habit of cleaning your bottle often. Now we just need someone to come out with a bottle that has a UV light, seals with pull tabs, easy-to-clean-threads, and a detachable bottom. There is a growing level of concern and awarness about microplastics in water, but a new study suggests that boiling water may remove many of these tiny particles. 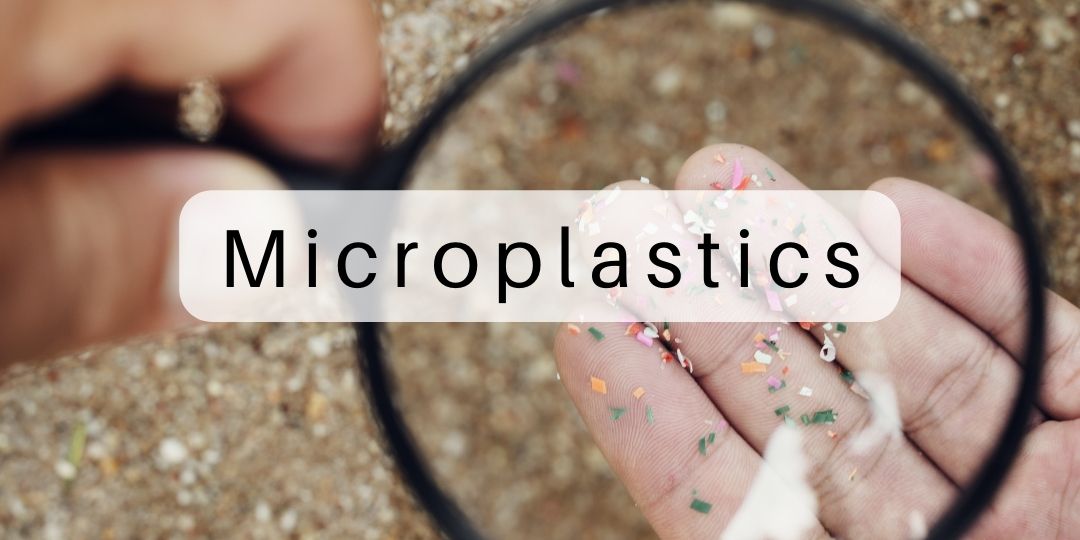 What are Microplastics and Nanoplastics?If you have not heard of microplastics in the past, the National Oceanic and Atmospheric Administration gives a quick recap here. (or just google "what are microplastics" and it should come up near the top of the list). Essentially, microplastics are small pieces of plastics that are less than 5 millimeters long. They are caused when small plastics are washed away or discarded, and they can also be created when larger plastics break down over time. The widespread use of plastics combined with the difficult of filtering these small pieces has caused to them to become increasingly prevalent and widespread in our drinking water, lakes, and oceans. And as you might expect, nanoplastics are similare but are even smaller. Some microplastics with common examples include:
 Does Boiling Water Remove Microplastics?The experiment is titled "Drinking Boiled Tap Water Reduces Human Intake of Nanoplastics and Microplastics." According the the abstract, the authors claim to: "present evidenence that polystyrene, polyethylene, and polypropylene NMPs can coprecipitate with calcium carbonate (CaCO3) incrustants in tap water upon boiling. Boiling hard water (>120 mg L–1 of CaCO3) can remove at least 80% of polystyrene, polyethylene, and polypropylene NMPs size between 0.1 and 150 μm. Elevated temperatures promote CaCO3 nucleation on NMPs, resulting in the encapsulation and aggregation of NMPs within CaCO3 incrustants." Essentially, this means that boiling water causes the plastics to combine with calcium cabonate (aka the "hard" in "hard water" that is in most people's homes), then the combined particles then drop to the bottom, leaving a layer of cleaner water on top. 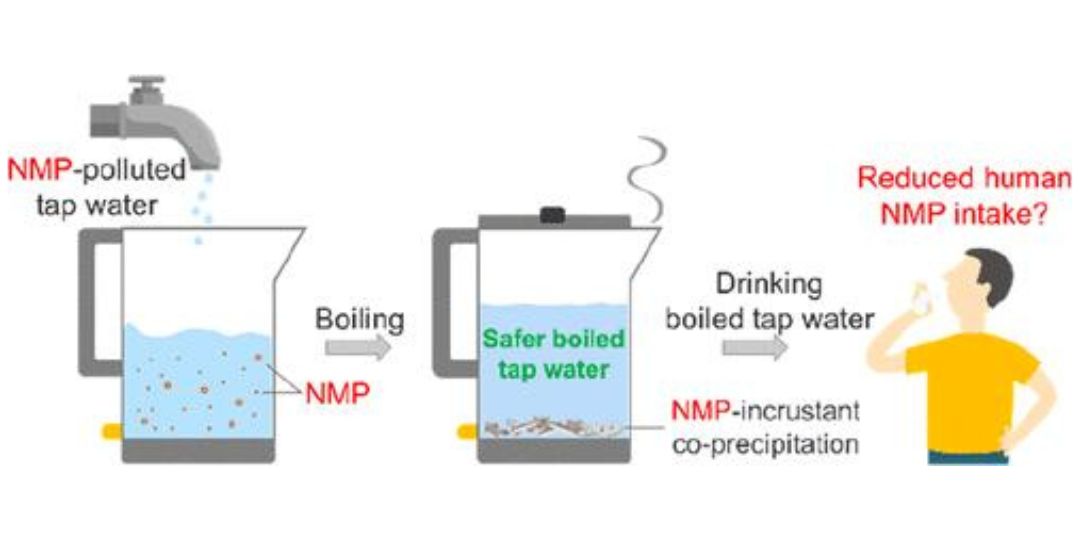 Visualization of the Precipitation of Microplastics ("NMP") and Calcium Carbonate (credit to the authors Yu, Wang, Liu, Li, and Zeng) I do not have full access to the article, but I would expect two followup questions should be considered that weren't covered in the abstract.
 Hydration News with BottlePro At BottlePro, we keep an eye out for hydration and water bottle news, then we summarize it and post it here. Check back with us to stay in the loop!
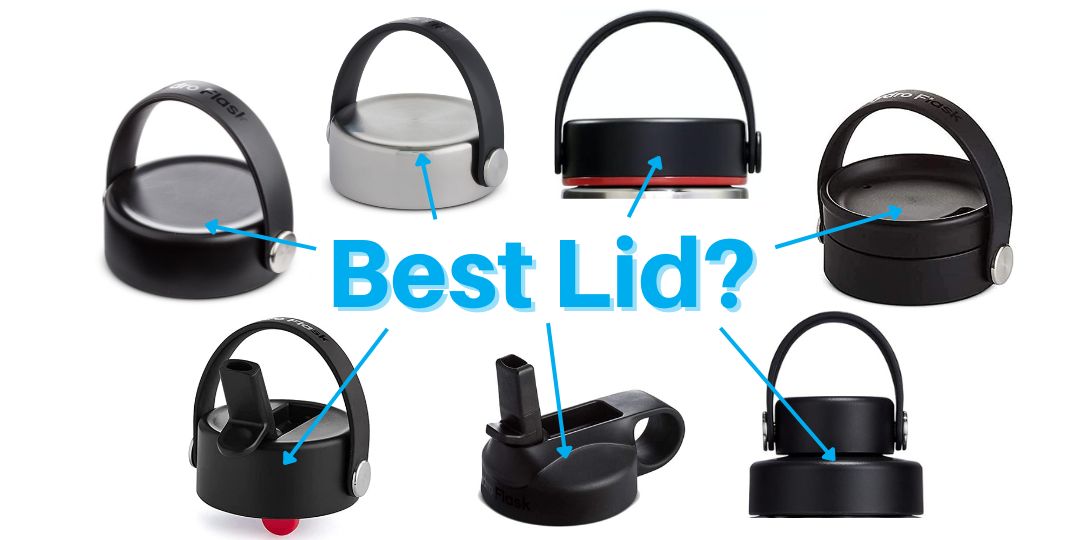 Which Hydro Flask Wide Mouth Lid is the Best? Which Hydro Flask Lid Should You Get?Hydro Flask currently has 7 wide mouth lid options, so which one is the best for you? I'll review each lid available, including 2 that many people have not seen before. Each Hydro Flask lid has its own advantages and disadvantages, so it can help to know more so you can get the best lid for you and your situation. Here's the quick list showing each of Hydro Flask's 7 available wide mouth lids as of today. Keep scrolling down for the full details. Video Review of Hydro Flask's Wide Mouth LidsWe also cover this in a YouTube video if you'd prefer to watch the recap! First, Some Overall Guidelines about Hydro Flask's LidsBefore we dive in, I'm going to review some of the most common general questions we see about Hydro Flask's lids. Are Hydro Flask's Wide Mouth Lids Interchangeable? For the most part, yes! With one exception, all wide mouth Hydro Flask lids fit all wide mouth Hydro Flask bottles. If you're buying a new lid, just double-check that it's a wide mouth lid, not a standard, aka "narrow" mouth lid. Are Hydro Flask's Lid Dishwasher Safe? Yes. Technically Hydro Flask's lids are all top-rack dishwasher safe according to Hydro Flask, as mentioned here. From Hydro Flask: "All Hydro Flask powder coated bottles are dishwasher safe. Hydro Flask Coffee Mugs are not powder coated, and they are not dishwasher safe." Should you hand-wash Hydro Flasks? Even though Hydro Flask lids are all technically dishwasher-safe, I typically recommend handwashing so you can make sure some of those hard-to-reach areas are scrubbed. Also, some of the lids have small pieces and seals that are better left to handwashing. Either way, it's a good idea to also use Bottle Bright cleaning tablets or a similar alternative every month or so to give your bottle a deep clean. These things really work! How to Contact Hydro Flask Directly I'm giving this information based on what I've read online, seen in person with their products, or heard back from Hydro Flask when I've submitted questions. If you have additional questions, either leave a comment on our Youtube video or send us a message and I'll try to answer it, or you can out to Hydro Flask directly with the link below. They're usually pretty good about getting back with answers within a couple days, and I've had great experiences with their customer support. Here are Hydro Flask's Available Wide Mouth Lids
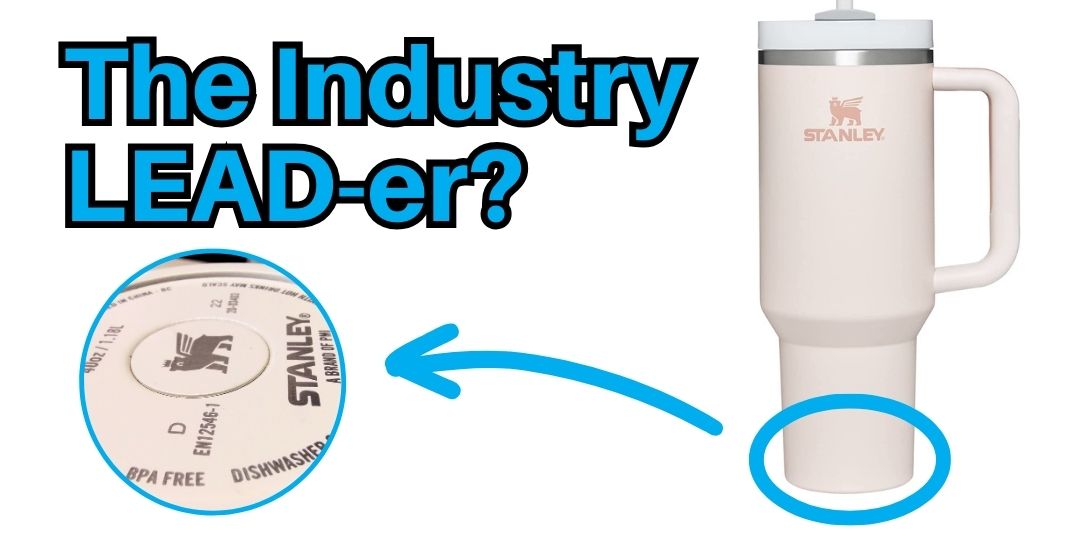 Are Stanley Mugs Safe?So it's official, Stanley bottles contain lead. But what does that really mean? Here's the cliff-notes summary:
But if the base of your bottle becomes damaged, then you may want to consider switching it out for a new one. Three of the most popular alternative brands that already use a lead-free plug are (click for links to their statements about lead):
As an Amazon Associate, we earn a small commission if you make a purchase through one of the links. Thank you for your support! If that's all the info you were looking for, then I hope this helped, thanks for stopping by, and we hope to see you later! But if you'd like to learn a little more about the backstory and ramificiations, then stay tuned because I'll dive into a little more detail and give my thoughts on what's coming next. Video ReviewWe also cover this in a YouTube video if you'd prefer to watch the recap! What Happened to Stanley?This all started when recent viral videos on Tiktok showed lead tests coming back positive in their Stanley bottles. Eventually, the company had to respond and issued a statement saying essentially that
Stanley's Statement about LeadStanley's full statement (as of 2/7/2024) is currently shown at this link and is copied below for easy reference:
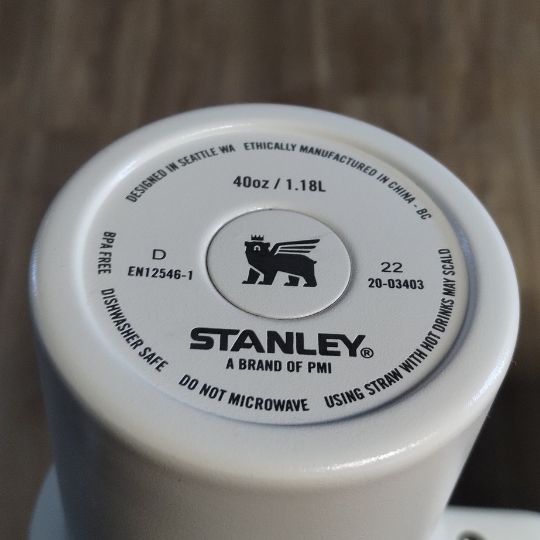
"At Stanley, one of the key features of our products is our vacuum insulation technology, which provides consumers with drinkware that keeps beverages at the ideal temperature. Our manufacturing process currently employs the use of an industry standard pellet to seal the vacuum insulation at the base of our products; the sealing material includes some lead. Once sealed, this area is covered with a durable stainless steel layer, making it inaccessible to consumers. Rest assured that no lead is present on the surface of any Stanley product that comes into contact with the consumer nor the contents of the product. In the rare occurrence the base cap of a product comes off due to ordinary use and exposes this seal, it is eligible for our Lifetime Warranty, available here: https://www.stanley1913.com/pages/contact-warranty
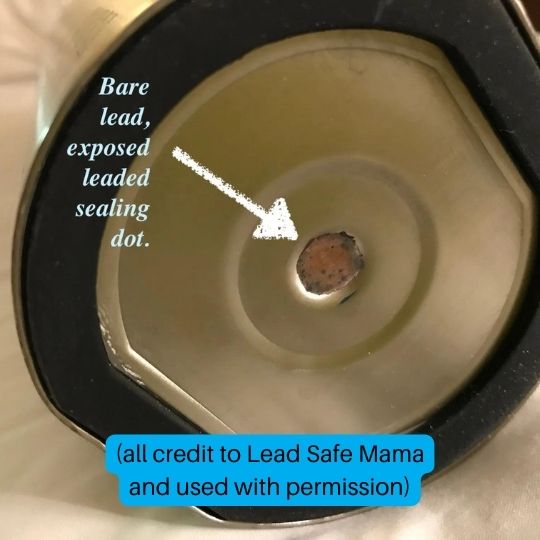
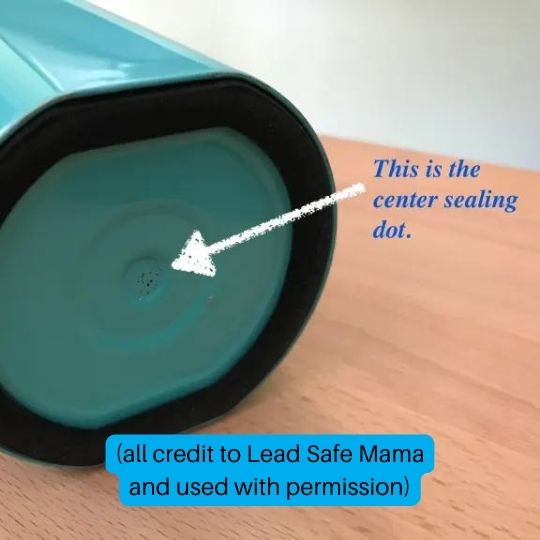
Stanley assures that its products meet all US regulatory requirements including Prop65. Stanley tests for and validates compliance on all products through FDA accredited 3rd party labs that verify our products follow strict guidelines including but not limited to BPA/BPS, PFOS, and phthalate regulatory requirements." Where is the lead in Stanley bottles?As mentioned, the specific use is in a lead-based solder that seals off the vacuum insulation. It's located at the base of the bottle in the middle. Lead Safe Mama, LLC. has an amazingly detailed breakdown and investigation into all kinds of different bottles, and these are some of her images showing what they look like in other bottles with similar construction.
If you're looking for more information about lead free bottles and containers, or just more information about lead safety in general, I'd highly recommend visiting Lead Safe Mama, LLC's website. She's been covering this information for years and has a pretty comprehensive review of most major bottle brands. Lead Safe Mama, LLC Links: Stanley's "Nalgene" Moment - Lead & BPAsTo summarize, lead doesn't contact the inside of the bottle, and it's covered up on the outside so you can't come in contact with it. So for most people and most situations, this is not a safety concern. And Stanley's statement also correctly noted that this is an industry standard because most dual wall vacuum insulated bottles you find on the market today use this same type of lead-based seal. But the problem for Stanley is that most people won't listen to the finer details or justifications. Instead, they just see the headlines saying "Stanley bottles contain lead." This gets shared and creates shockwaves online.
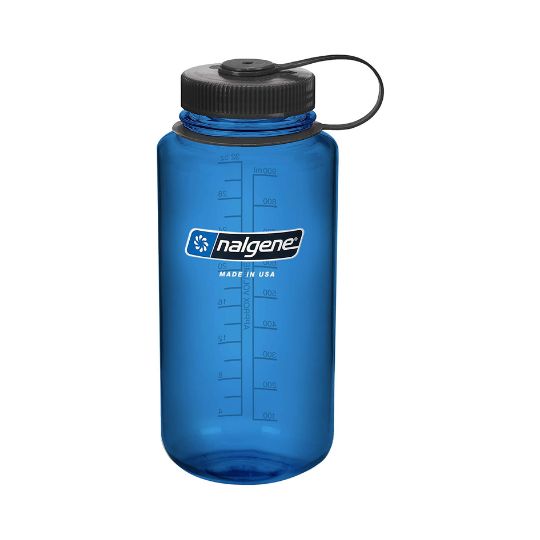
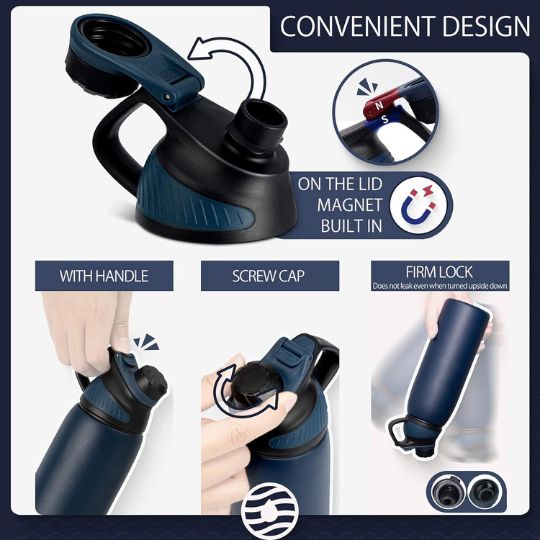
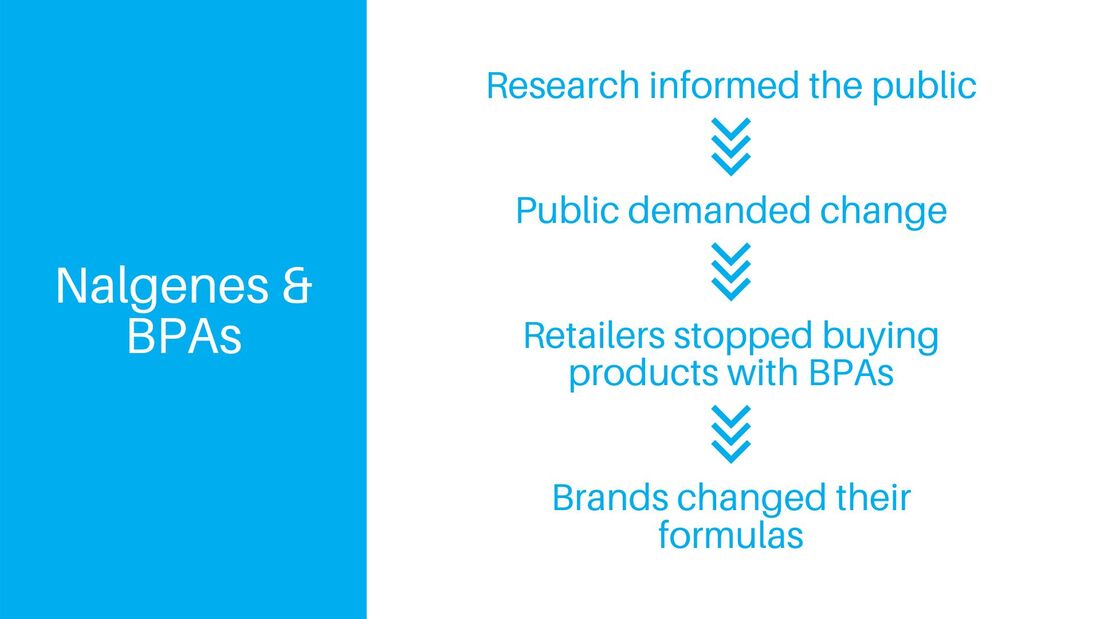 How Public Pressure Caused Nalgene to Change their Materials to Avoid BPAs But the damage had already been done, and fallout from the BPA revolution paved the way for alternative brands like Klean Kanteen and Hydro Flask to take significant market share away from Nalgene. What will Stanley do about Lead?Now Stanley is in a similar situation with lead, and they will almost certainly update their manufacturing process to remove lead from the equation. The good news for Stanley is that this is already being done. As mentioned, companies like Hydro Flask, Klean Kanteen, and Owala already use a lead-free method to seal in the vacuum, so it shouldn't be difficult for Stanley to adopt similar procedures. The problem for Stanley is whether they can do this quickly, transparently, and fairly enough for their loyal customers in a way that won't leave them feeling alientated. If they can pull this off, then they could maintain their position as social media's favorite bottle brand. If not, you can bet that other brands will fill the public's new requirement to know their bottles are 100% lead-free. Will Stanley Let you Exchange Bottles for Lead-Free Ones?Honestly, I wouldn't be surprised if Stanley offers some kind of bottle swap promotion where customers can trade in their older bottles for a new lead-free version. Yes, this would be extremely costly, but this kind of move would show their loyal followers that the company stands by them and their products. Time will tell if they do something like this, but you can almost guarantee that most major brands will switch to lead-free plugs as soon as possible and update their packaging to make sure people know about it. In the end, this is a welcome change. The further we can keep lead from our food and beverages, the better, and this market shift will make many people feel a lot more comfortable with their water bottles that they use every day. 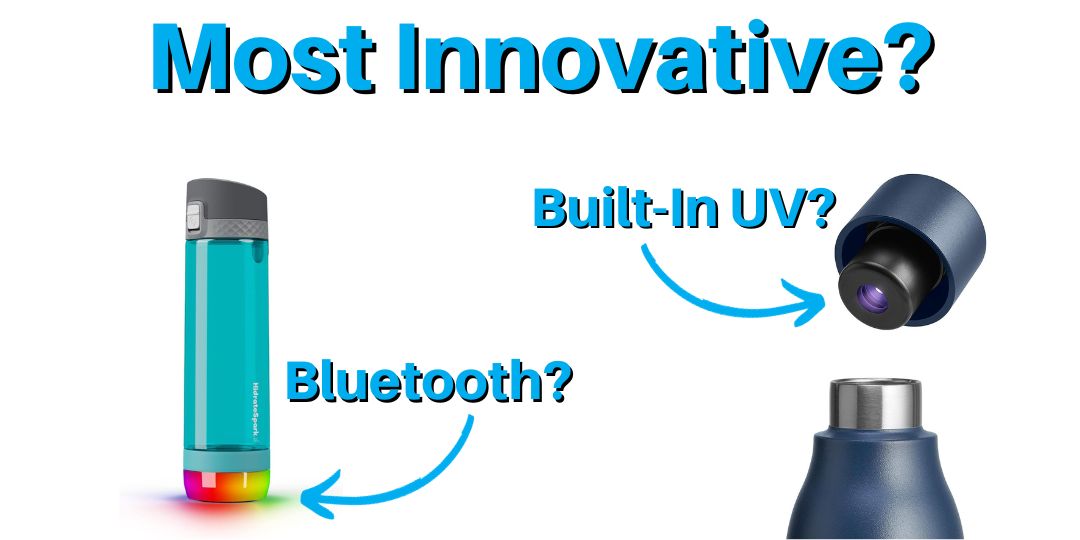 8 Bottles that Change HydrationToday’s water bottle market is crowded and complex, and manufacturers are always looking for innovative ways to stand out. Many times, these features are just gimmicks, but some bottles really do improve what water bottles are capable of. At BottlePro, we’ve reviewed and seen a lot of these market changes, and we’re going to share with you 8 of our favorite innovators. The first ones start with some simpler quality-of-life improvements, and towards the end of the video we’ll show some of the more high-tech options on the market. We’ll also branch out a bit and show a couple of coffee mugs that you might want to take a look at. Video ReviewWe also cover this in a YouTube video if you'd prefer to watch the recap! As an Amazon Associate, we earn a small commission if you make a purchase through one of the links. Thank you for your support! The Big PictureBonus: Coffee MugsThe DetailsFJbottle (Convenience)
EcoVessel (Multi-Use)
Owala (Combo Lid)
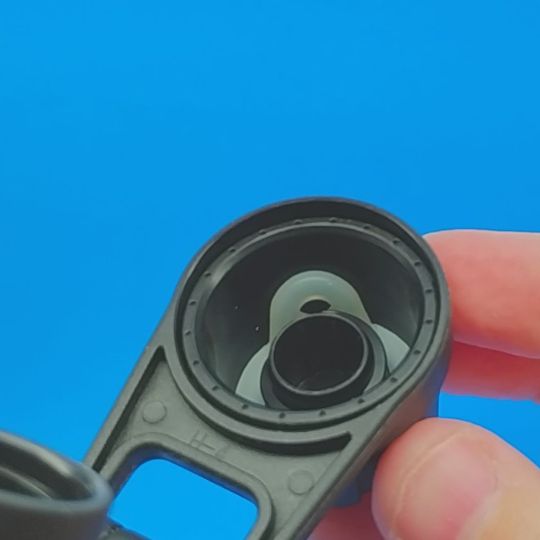
RevoMax (Threadless Lid)
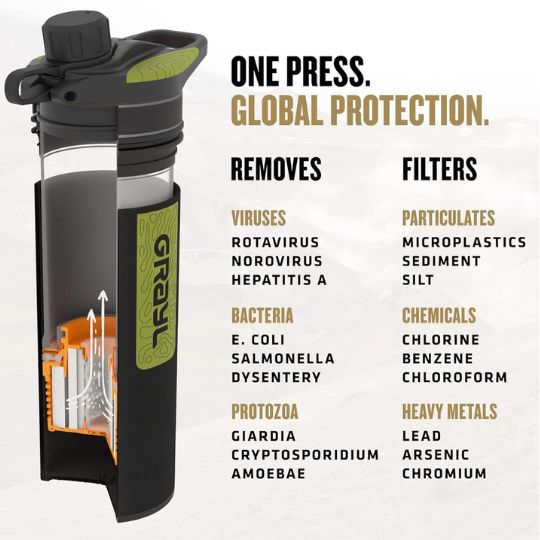
GRAYL Geopress (Filter)
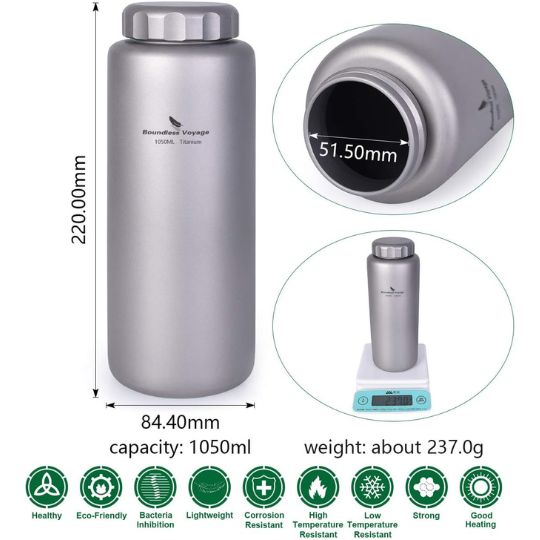
Boundless (Titanium)
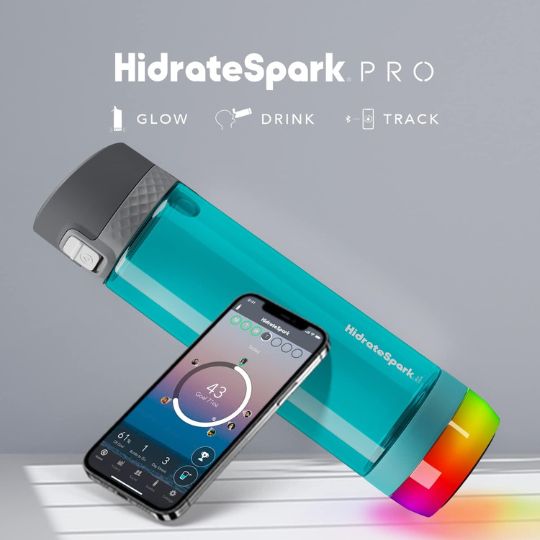
Hidrate Spark (Hydration Tracking)
LARQ (UV Sanitizing)
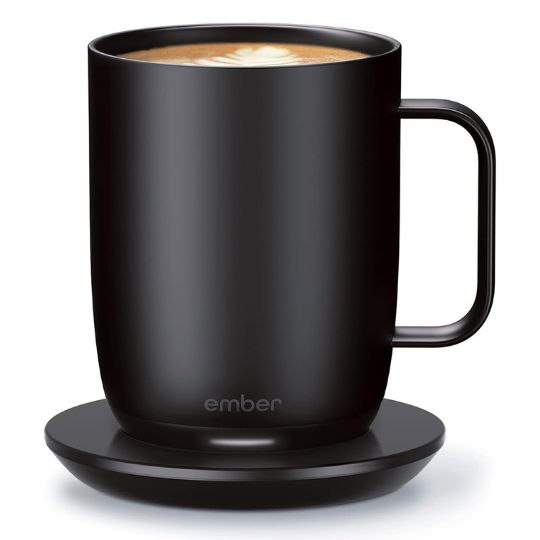
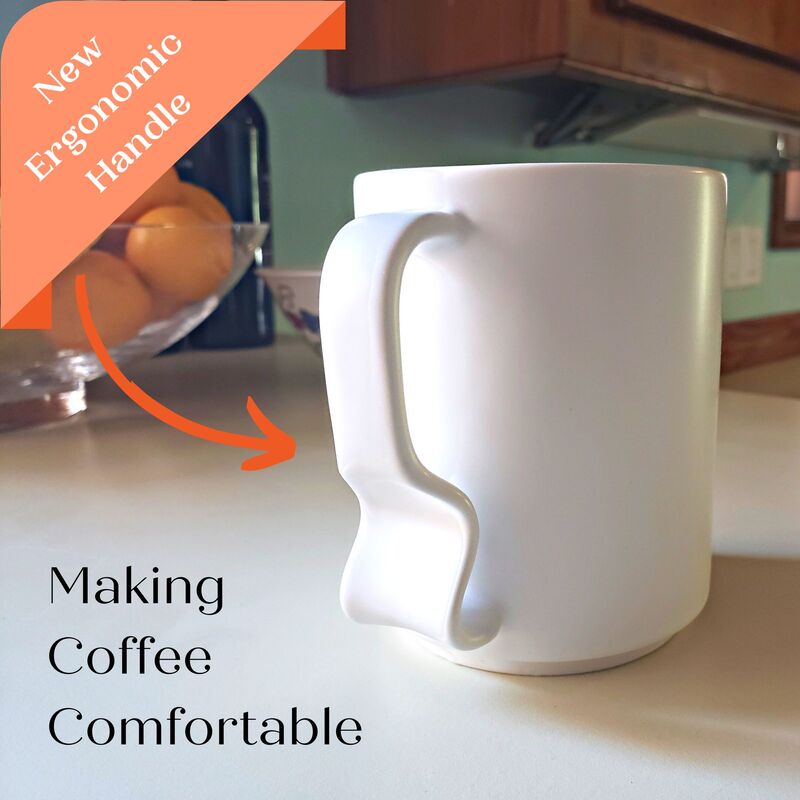
Ember (Temperature Control)Momnt Mugs (Ergonomic, No-Slip Grip)
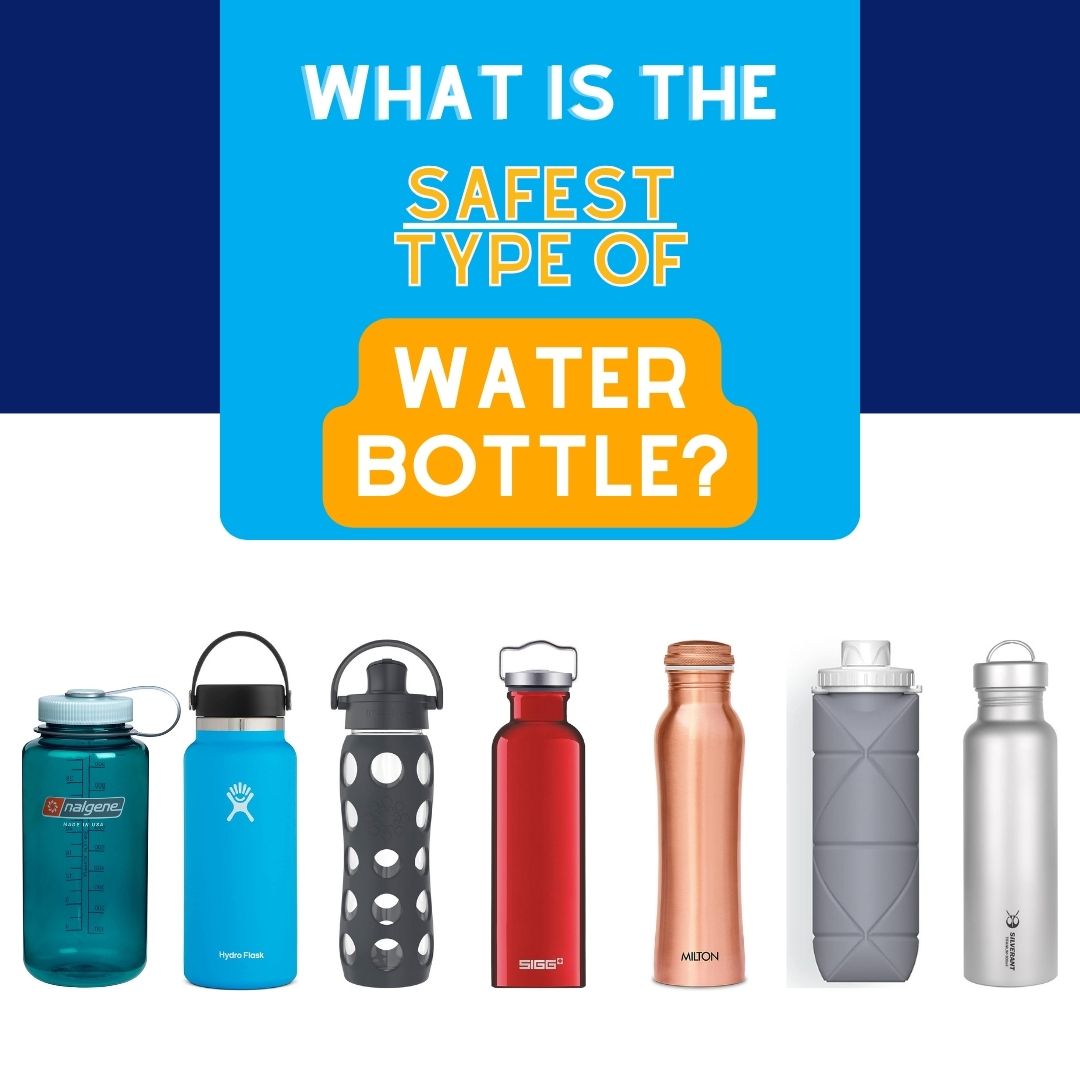
 Top 3 Questions to Ask before Buying a Water Bottle for your Child As a parent, you have a lot to think about when it comes to your child. In this post, we we'll talk through three important questions to consider before buying a bottle for your little one. And we’re glad you’re here. BottlePro is all about health through hydration, and teaching your child to use a reusable water bottle will have many benefits in the long run. Proper hydration habits are tied to better health, and avoiding single-use bottles will help your child’s future wallet as well as the environment that he or she is inheriting. So without further ado, let's get started! Question #1 - Is Your Water Bottle Safe?Moving on to question number one, is it safe? As with anything with your child, the first question you should ask is, will this be safe for my child to use every day. Normally the concern with bottles is about leaching, or whether chemicals or toxins seep from your bottle into your drink. Aside from that, there are physical hazards, which is particularly true with glass because it can break into sharp pieces. The Safest Water Bottle Materials for ChildrenThe safest bottle materials that we recommend using for children are:
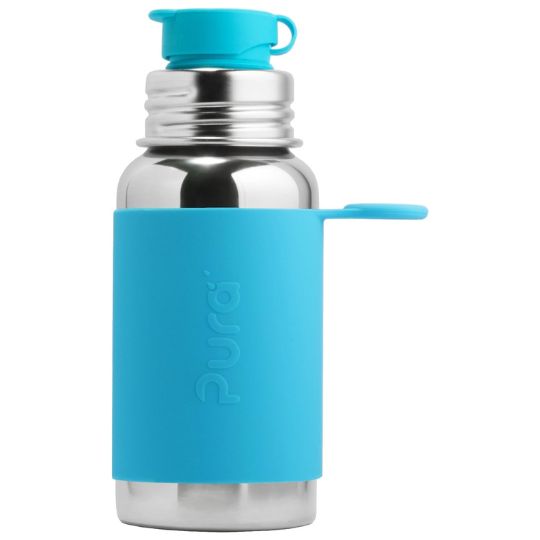
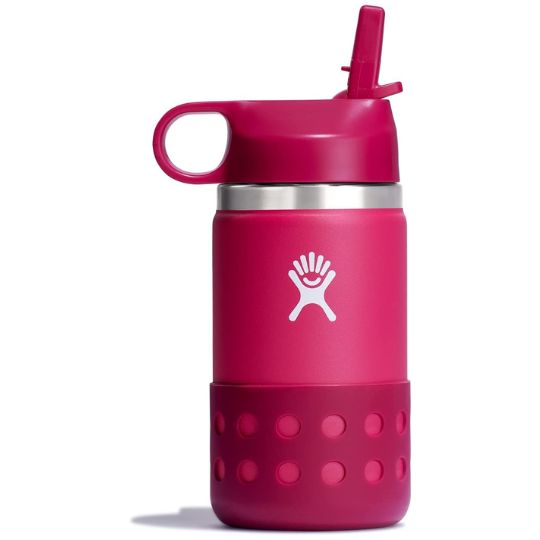
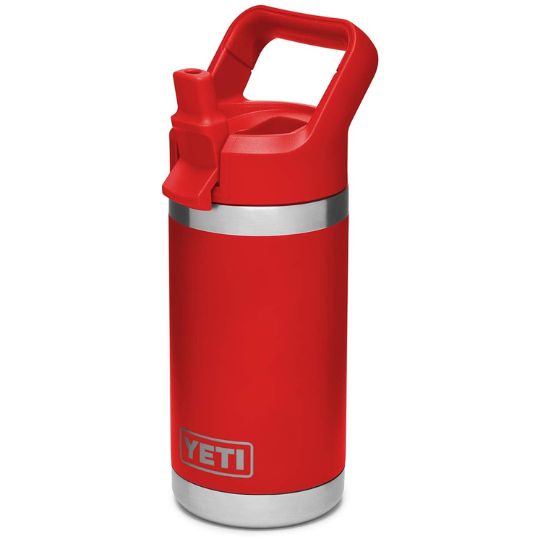
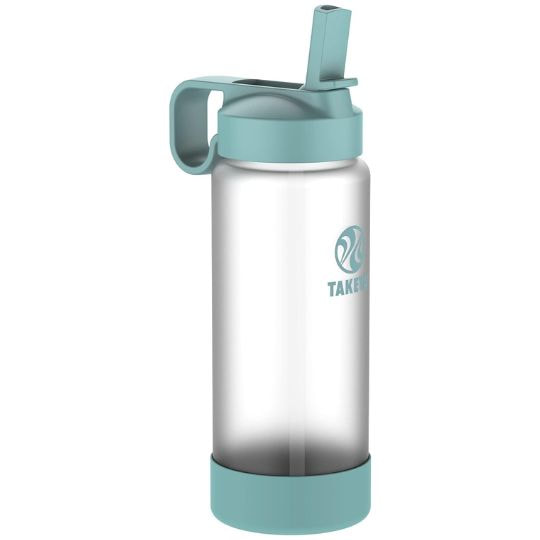
STAINLESS STEELAre Stainless Steel Bottles Safe for Kids? In many ways, stainless steel bottles are the best option for children. They’re widely shown to be safe, are easy to clean, and don’t have an inner liner like aluminum bottles. There are plenty of reputable brands with many different style to choose from, so you have plenty of options to pick what’s right for you and your child. And unlike glass, they won’t shatter and potentially create a physical hazard if your child drops the bottle. Stainless steel bottles typically come in one of four alloys or grades: 304, 316, 18/8 and 18/10. Any of these grades should be fine with normal use, but if you’re really looking for the best grade, consider buying a bottle made with 316 steel because it’s more corrosion resistant. Should You Avoid Stainless Steel Bottles for Kids? For the most part stainless steel bottles are a pretty proven and safe option, but there's one thing to keep in mind with many of them. Make sure you look at the lid construction. Many bottles that are made with stainless steel bodies still have exposed plastic under the lid that can come in contact with the water, so if your goal is to completely avoid plastic contact, keep this in mind. I’ll give some links in the description to bottles that I’m aware of that completely prevent plastic from contacting your water, and if anyone else knows of other options, please leave a comment below to let us and other viewers know. The Best Stainless Steel Bottles for Kids There is a lot of competition in the stainless steel water bottle market, so there are plenty of options to choose from. These are some of our favorites!
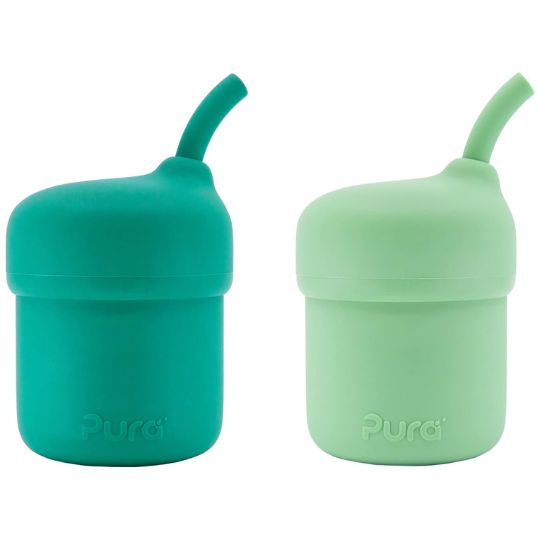
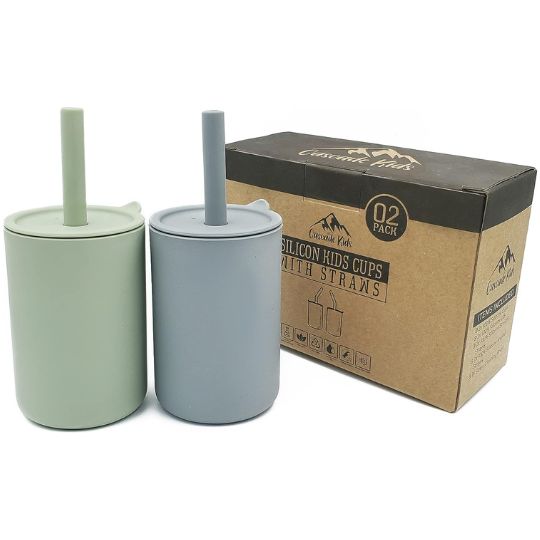
SILICONEAre Silicone Bottles Safe for Kids? For silicone, most research shows that it is very safe and a great alternative to plastic. It is BPA-free, extremely durable, lightweight, and flexible. Just make sure it says food-safe or food-grade. Pretty much every bottle with silicone will list this on the packaging, but it doesn’t hurt to check. And if you’re buying from a lesser-known brand, you could also reach out to the manufacturer for more testing info if you’d like to learn more. Pura is a brand we haven’t tested yet, but looking at their website, they are leaning heavily into silicone-based options and are a good one to check out. Should You Avoid Silicone Bottles for Kids? In my opinion, the biggest potential downside to silicone is what we don’t know. While research has mostly shown it to be safe, compared to some other materials like glass, silicone is still relatively new and it’s always possible that new research could bring up potential concerns. I wouldn’t blame you if you want to avoid silicone bottles for this reason, but keep in mind that most water bottles use some silicone, either in the seals, straw, or spout. It’s very hard to completely avoid silicone in water bottles nowadays. The Best Silicone Bottles for Kids The 100% silicone bottle market is relatively new, so there aren't nearly as many options to choose from compared to stainless steel. Many do not have great reviews, so we're waiting for this sub-genre to develop more. Still, here are a few worth considering for children of varying ages.
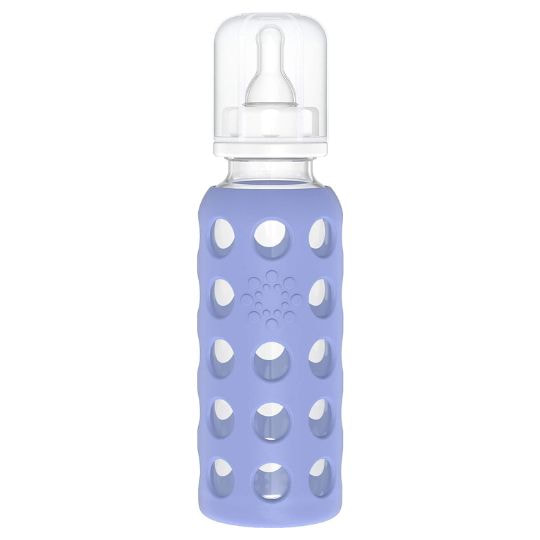
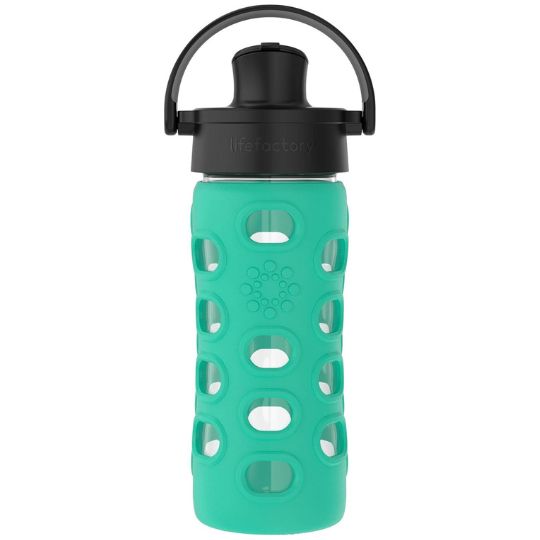
GLASSAre Glass Bottles Safe for Kids? Glass gives the cleanest drinking experience, and many people feel safest using glass because it’s a material that’s been in use for a long time and has a more natural feel to it. Many people prefer glass because they find that it doesn’t have an aftertaste that you might have with plastic, silicone, or stainless steel. And even though materials like BPA-free plastic and silicone are tested to be safe, glass is made with fewer additives and chemicals so many people feel safer that it helps avoid leaching of potentially harmful chemicals. Should You Avoid Glass Bottles for Kids? Now all that sounds great, but there is a big drawback. Glass is usually the heaviest bottle and can be extra bulky, so it may be more difficult for your child to manage than alternatives like plastic or stainless steel. And obviously, glass can also break and create a physical hazard with sharp edges. If you want to get a glass bottle for your child, make sure it has a protective sleeve and is made of borosilicate glass because it’ll less likely to shatter and is more temperature and shock resistant. You may want to avoid mason jars because most of them are not made of borosilicate glass. The Best Glass Bottles for Kids These are some of our favorite glass bottle options for kids within a few age ranges.
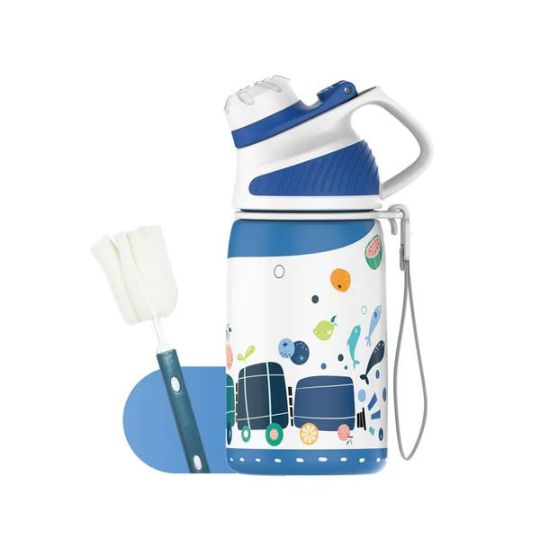
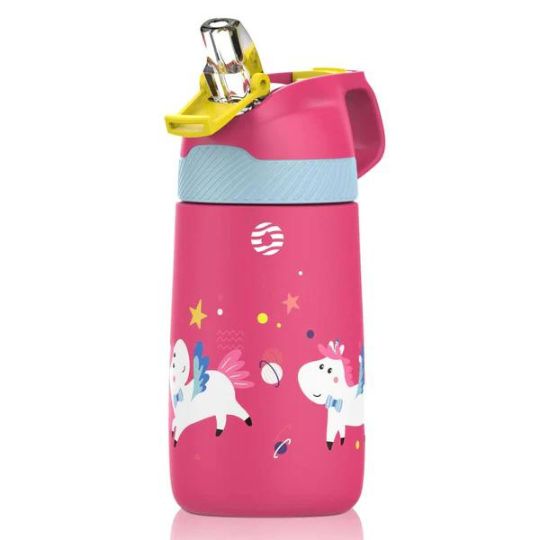
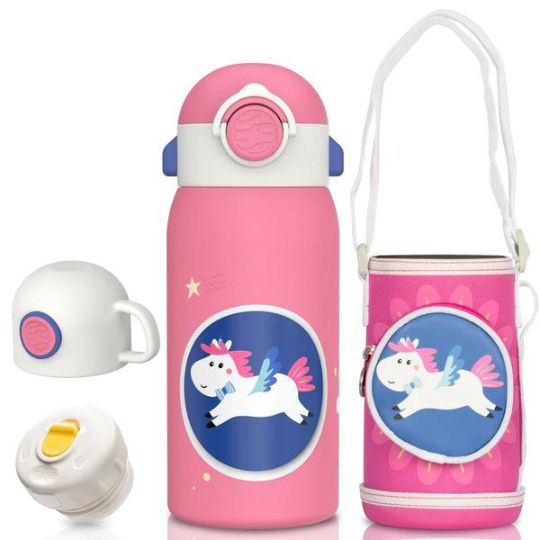
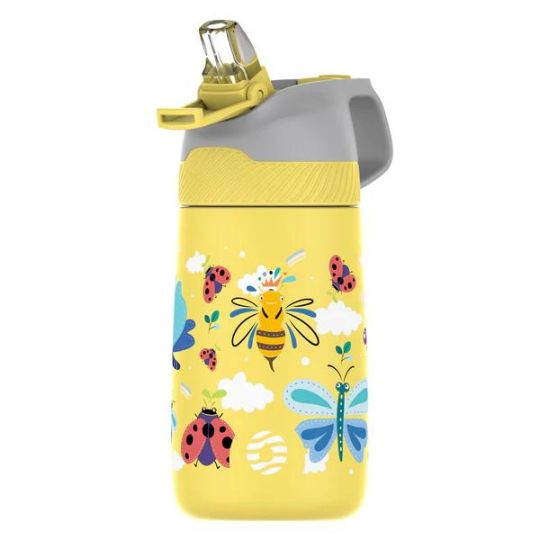
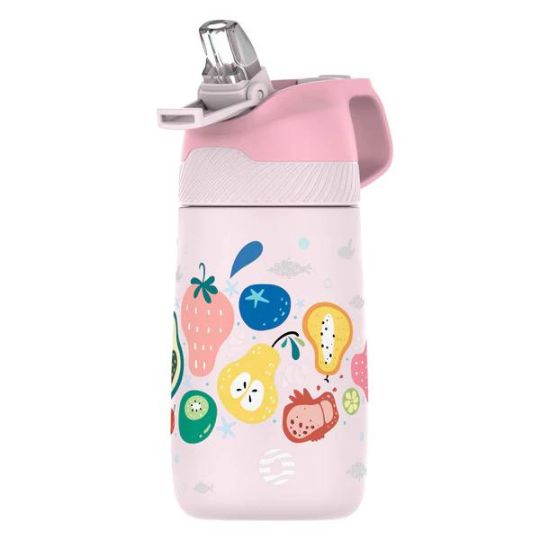
SPONSORFJbottle Real quick, I’d like to take a few moments to thank FJbottle for sponsoring this video. One thing they do well is clearly label what type of stainless steel is used in their bottles, and they have a mix of 304 and 316. With other brands, sometimes it can take more digging around online to know which grade it is, and higher-grade 316 stainless steel bottles can sometimes be hard to find. They sent us these bottles to help us have some content for this video, and we appreciate the different designs they’ve come up with. There are spout lids, straw lids with silicone tips, and quite a few different designs for whatever your kid is interested in. Each bottle comes with a cleaning brush and a straw cleaner if it’s a straw lid, so it’s easier to keep your bottle clean right from the start without having to buy a cleaning kit, though you eventually may want a more robust bottle cleaning brush. This one is a kid-size of the 34-ounce bottle that I used a lot over the last few months and honestly became one of my favorite bottles. It has a magnetic lid, a carrying strap on the side that I ended up using a lot more than I thought I would, and an anti-slip base that helps prevent a few dents and spills. Please note that they do have plastic under the lids, but the fact that they have 316 stainless steel options and silicone straw options tells me that they are very aware of material safety. We’re very thankful for their support, so we hope you’ll visit www.fjbottle.com to learn more! Question #2 - Which Bottles are Easiest for Children to Use?The next question you’ll want to ask yourself is whether the bottle will be easy for your child to use. What Size Water Bottle is Best for Children Pick a size that’s a good fit for your child depending on his or her age and ability. I’d recommend sticking to 16-ounces at most for younger kids because larger bottles like 20-ounce and especially 32 and 40-ounce would be too much to handle. Bottles can be pretty big and bulky, so look for features that make a bottle easier to carry like a carrying strap, pouch, or large handle. Are Straw or Spout Bottles Better for Children? To make it less likely to have spills, there are a few things to keep an eye out for. Straw lids are easier for many children to drink from, but they're also more prone to leaking, especially if you store a bottle on its side like in a backpack. So depending on your child's age, you may one one more than the other. Double-check the reviews since there’s almost always someone who will mention if it leaks easily. Question #3 - Will Your Child Like It?The third question you should ask is, will my child even want to use this bottle? Now for sure, buying a bottle that’s easy to use important to encourage regular use, but kids are all about style and sporting something that’s fits their interests. This is where having different styles really comes in handy. Is your kid into trains? Unicorns? Pink? Blue? Brands like FJbottle and Klean Kanteen have designs with different graphics and themes, while brands like Hydro Flask and YETI only have color variations. You know your kid better than anyone else, so get them a bottle that strikes a chord with what they’re interested in. That will help encourage them to keep their bottle with them and build on healthy hydration habits. |


PS Kreative, LLC, Licensed in North Carolina, USA (ID # 2514262), DBA "BottlePro"